Haldex coupling noise troubleshooting is the process of identifying and resolving unusual sounds produced by the Haldex coupling unit or its integrated oil pump, which forms the heart of many on-demand all-wheel-drive systems fitted to vehicles including Audi, VW, Skoda, and Volvo models. A whine, grind, or shudder from the rear of the car is rarely just an annoyance. It signals that something within the coupling, pump, or fluid circuit is failing. The good news is that most faults follow predictable patterns, and with the right diagnostic approach, you can pinpoint the cause before it becomes a costly drivetrain rebuild.
How to diagnose Haldex coupling noise with diagnostic tools
Systematic diagnosis is the only reliable starting point for any Haldex noise complaint. Guesswork is a major risk and can lead to ineffective repairs, wasted parts, and recurring faults. The correct sequence runs from fault code scanning through live data analysis and finally to output testing.
Running fault code scans and live data checks
Start with a full fault code scan using VCDS (VAG-COM Diagnostic System) or an equivalent OBD tool capable of accessing the Haldex control module. Fault codes alone rarely tell the whole story, but they narrow the field considerably. After clearing and rescanning, move to live data to observe clutch status, pump current draw, PWM signal, and supply voltage in real time while a second person actuates the system.
Measuring electrical proxies such as clutch pump current, PWM, and voltage alongside mechanical engagement status is the only way to conclusively confirm whether the pump is receiving a command and responding correctly. A pump that draws no current despite a valid command points to a wiring fault or dead motor. A pump drawing excessive current with no pressure response suggests a mechanical blockage or internal failure.
Performing output tests correctly
VCDS output tests allow you to command the Haldex pump and clutch directly. Selecting the correct actuator state matters here. Many technicians select “open” when they should select “close” to observe clutch engagement and pump movement. This single error makes the test appear inconclusive and leads to misdiagnosis.
Follow these steps in order:
- Connect VCDS and navigate to the Haldex or 4Motion control module.
- Select “Output Tests” and identify the clutch actuation function.
- Choose the “close” state and observe whether the pump motor activates and current rises.
- Log the PWM duty cycle and compare it against known good values for your generation of Haldex.
- Listen for pump noise during actuation and note whether it matches the noise reported during driving.
Pro Tip: Never reset adaptation values in VCDS without understanding the consequences. Experienced technicians caution that resetting adaptation indiscriminately can adversely affect ABS and other system configurations, complicating Haldex module behaviour significantly.
Does fluid condition cause Haldex coupling noise?
Yes. Contaminated or degraded Haldex fluid is the single most common trigger for coupling noise, and it is also the most preventable. Contamination from clutch material or debris is the most common root cause of Haldex pump problems, typically caused by missed or delayed servicing that allows filters and pickup screens to become blocked. When the pump cannot draw sufficient oil, it overworks, overheats, and eventually fails.
Symptoms of contaminated fluid
Contaminated fluid produces a recognisable set of symptoms that you should cross-reference against your noise complaint:
- A high-pitched whine from the rear of the vehicle, particularly under load or when turning
- Shudder or vibration when pulling away from a standstill or cornering at low speed
- Delayed rear axle engagement on slippery surfaces, where the rear wheels take noticeably longer to receive drive
- Discolouration of the fluid on inspection, ranging from dark brown to black with a burnt smell
- Visible metallic particles or clutch material in the drained fluid or on the filter screen
Haldex oil and filter replacement is recommended approximately every 20,000 miles for oil and every 40,000 miles for the filter. Sticking to this schedule dramatically reduces the risk of overheating, clutch burnout, and pump failure. Many owners stretch these intervals and pay for it with a pump replacement that costs several times more than a service kit.
Inspecting fluid and filter condition
Drain the fluid into a clean container and assess its colour and consistency. Fresh Haldex fluid is a clear amber. Anything darker than light brown warrants a full flush. On certain generations, removing the pump to clean the pickup screen is necessary. Simply replacing the fluid without addressing a blocked screen leaves the root cause in place and the noise will return.
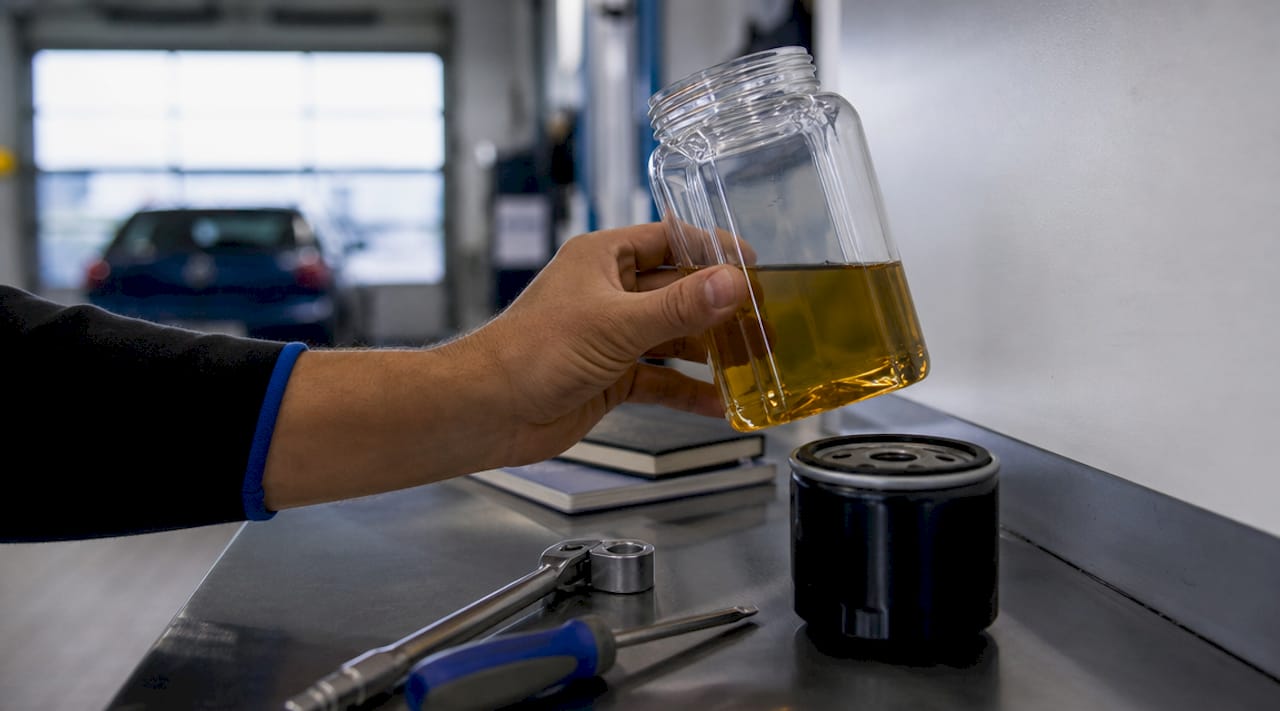
Pro Tip: Hold the drained fluid up to a light source and look for suspended metallic particles. Fine grey metallic swarf indicates pump or clutch wear. Coarse particles suggest more serious mechanical damage that fluid replacement alone will not fix.
What mechanical and electrical faults cause Haldex noise?
Not every Haldex noise originates from the fluid. Mechanical wear and electrical faults each produce distinct sounds and diagnostic signatures. Understanding the difference saves time and prevents unnecessary parts replacement.
| Fault type | Typical noise | Diagnostic indicator |
|---|---|---|
| Pump motor wear or failure | High-pitched whine or grinding | Low or zero current draw during output test |
| Clutch plate damage | Shudder, rumble, or banging under load | Metallic debris in fluid, abnormal clutch slip data |
| Bearing wear in coupling | Rumble or hum that increases with speed | Noise correlates with road speed, not engine speed |
| Wiring fault or connector corrosion | Intermittent noise or no engagement | Voltage drop across pump supply wires |
| Control unit fault | Erratic engagement, warning lights | Fault codes in Haldex module, no output test response |
Pump failure symptoms often include reduced rear axle engagement and poor traction on wet or loose roads, and they may or may not trigger warning lights. This is why noise alone is an unreliable guide. A bearing rumble that increases with vehicle speed but stays constant regardless of engine load points to a mechanical coupling or differential issue rather than the pump. A whine that appears only under heavy throttle and disappears at idle is more likely pump or fluid related.
Electrical faults deserve particular attention on older vehicles. Corroded connectors at the Haldex pump plug are a frequent cause of intermittent noise and engagement failure. Resistance in the supply circuit reduces pump speed, which reduces pressure, which causes the clutch to slip and produce noise under load.
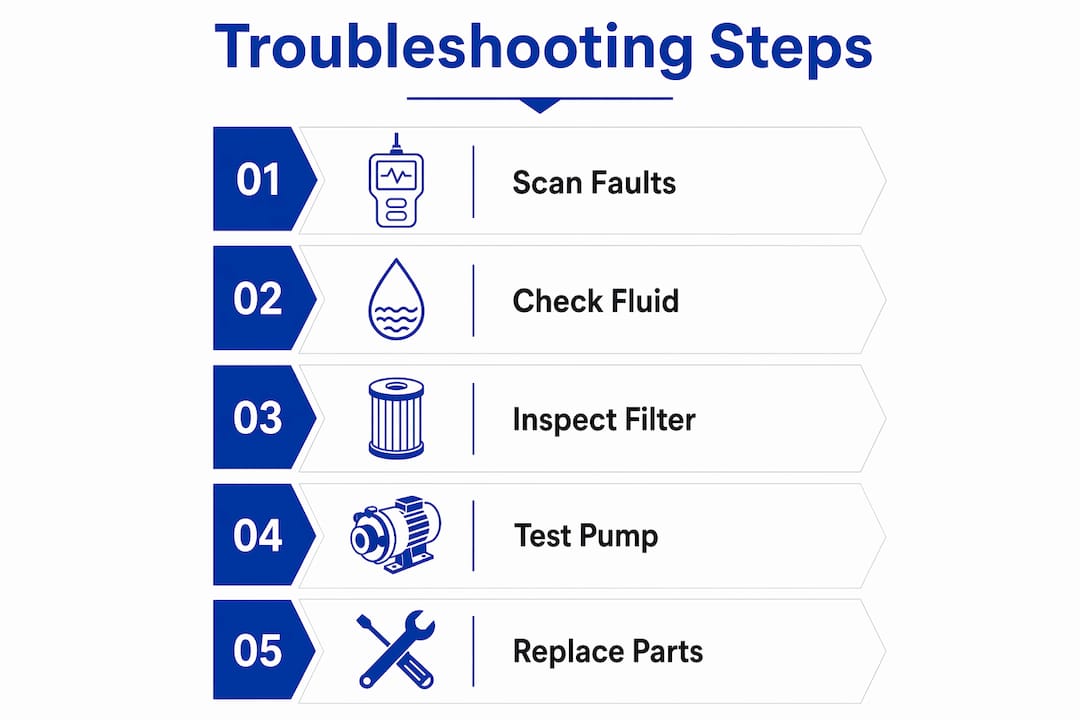
Step-by-step guide to troubleshoot Haldex coupling noise
Work through this sequence methodically. Skipping steps is the most common reason a noise returns after repair.
Preparation: Raise the vehicle safely on axle stands. You need access to the Haldex unit beneath the rear of the vehicle. Gather VCDS or equivalent diagnostic software, a fluid drain pan, a torque wrench, and the correct replacement fluid and filter for your Haldex generation.
- Listen and locate. Drive the vehicle and note exactly when the noise occurs: under load, during turns, at speed, or only when warm. Temperature-dependent behaviour often complicates diagnosis because some faults only appear once the coupling reaches operating temperature.
- Scan fault codes. Connect your diagnostic tool and log all fault codes from the Haldex module, ABS module, and transmission module. Note any codes related to pump current, clutch slip, or wheel speed sensor discrepancies.
- Perform live data checks. With the vehicle stationary and then moving, monitor pump current, PWM, and clutch engagement status. Compare values against your vehicle’s known specifications.
- Run output tests. Follow the VCDS output test procedure described earlier. Confirm the pump activates, draws correct current, and produces audible operation.
- Inspect fluid and filter. Drain the fluid, assess its condition, and inspect the filter and pickup screen for contamination or blockage.
- Clean or replace the filter and screen. On generations where the screen is accessible only by removing the pump, do not skip this step.
- Refill with correct fluid to the specified volume. Overfilling or underfilling both cause operational issues.
- Retest under driving conditions. Repeat the original driving scenario that produced the noise and confirm resolution.
Neglected fluid can cause poor rear axle engagement and AWD or ABS faults. However, not all AWD faults are fluid related. Other causes include wiring issues, control faults, and differential problems. Proper diagnosis extends beyond a fluid change.
Common mistakes to avoid during this process:
- Assuming the noise is Haldex without ruling out wheel bearings, tyres, and the rear differential first
- Using incorrect fluid type or volume for your specific Haldex generation
- Ignoring tyre size mismatches. A reported case showed vibrations and noise that resolved after tyre replacements, demonstrating that unequal tyre circumferences force the Haldex coupling to work constantly and generate heat and noise
- Replacing the pump without cleaning the pickup screen, which allows fresh contamination to damage the new unit immediately
Key takeaways
Effective Haldex coupling noise troubleshooting requires combining diagnostic software, physical inspection, and correct fluid maintenance rather than relying on noise symptoms alone.
| Point | Details |
|---|---|
| Diagnose before replacing parts | Run VCDS fault scans and output tests before ordering any components. |
| Fluid condition is the primary cause | Contaminated or degraded fluid causes most Haldex noise and pump faults. |
| Service intervals matter | Replace Haldex oil every 20,000 miles and the filter every 40,000 miles. |
| Tyre setup affects noise | Mismatched tyre sizes force constant coupling engagement and generate noise. |
| Electrical faults mimic mechanical ones | Check pump wiring and connectors before condemning the pump motor itself. |
What I have learned from years of Haldex noise diagnosis
After working through dozens of Haldex noise complaints, the pattern that surprises most people is how rarely the noise itself tells you what is actually wrong. I have seen vehicles with a pronounced rear whine that turned out to be a corroded pump connector costing a few pounds to fix, and vehicles with a subtle shudder that concealed a clutch pack on the verge of complete failure.
The most reliable approach I have found is to treat the diagnostic scan as non-negotiable. Physical inspection and fluid analysis are equally important, but combining diagnostic scans with physical inspection and fluid analysis yields more reliable results than any single method alone. Technicians who skip straight to fluid replacement because “it usually fixes it” are gambling, and they often lose.
Tyres catch people out more than almost anything else. I have seen a well-maintained Haldex system produce persistent noise simply because the rear tyres were a slightly different rolling circumference to the fronts. The coupling compensates constantly, generates heat, and eventually makes its displeasure audible. Always verify tyre sizes and wear levels before concluding the Haldex unit itself is at fault.
My strongest advice is to invest in preventative servicing. A Haldex service kit costs a fraction of a pump replacement. The owners who service on schedule almost never end up in the diagnostic rabbit hole described in this article.
— Mindaugas
Get the right parts for your Haldex service
Resolving Haldex coupling noise starts with using the correct OEM-grade components for your specific generation. Haldexparts stocks genuine pumps, oils, and filter kits for first through fifth generation Haldex systems across Audi, VW, Skoda, Volvo, and Land Rover applications. The 4th generation oil and filter kit covers popular models including the Tiguan, Golf R, and Yeti, while the 5th generation service kit addresses common pump and fluid failures on Volvo AWD platforms. Browse the full range of genuine Haldex parts at Haldexparts, with free shipping on orders over £150 and fast UK delivery.
FAQ
What causes a whining noise from the Haldex coupling?
A whining noise most commonly indicates contaminated or degraded Haldex fluid restricting oil flow to the pump, or a pump motor beginning to fail. Running a VCDS output test and inspecting fluid condition will confirm which fault is present.
How often should Haldex fluid and filter be replaced?
Haldex oil should be replaced approximately every 20,000 miles and the filter every 40,000 miles. Sticking to this schedule prevents the contamination that causes most coupling noise and pump failures.
Can mismatched tyres cause Haldex noise?
Yes. Tyres with different rolling circumferences force the Haldex coupling to engage continuously, generating heat and noise. Always verify that all four tyres are the same size and at similar wear levels before diagnosing the coupling itself.
Is it safe to drive with Haldex coupling noise?
Driving with unresolved Haldex noise risks accelerating pump wear and clutch damage, which can lead to complete loss of rear axle drive. Diagnose and address the fault promptly to avoid a more expensive repair.
Can I fix Haldex noise by changing the fluid alone?
A fluid change resolves noise caused purely by degraded oil, but it will not fix pump motor failure, clutch plate damage, or wiring faults. Always perform a diagnostic scan alongside the fluid service to confirm no underlying mechanical or electrical fault is present.