
The most common Haldex AWD coupling faults are low-speed binding in tight turns, delayed or absent rear-axle engagement, grinding or high-pitched whining noises, and intermittent AWD or traction-control warning lights. If you are experiencing any of these right now, do three things before anything else:
- Check all four tyres for matching tread depth and circumference — tyre mismatch is the single most frequent misdiagnosis for a perceived coupling fault
- Inspect the coupling area for visible fluid leaks and note the colour of any fluid on the drain plug
- Connect a scan tool and retrieve stored AWD module events — this one step usually separates a pump or electrical fault from internal mechanical wear
If symptoms are severe (constant binding, grinding under load, or a warning light that stays on), avoid long motorway runs and do not tow until the system is inspected.
Table of Contents
- What does a failing AWD coupling feel like while driving?
- What actually causes Haldex coupling failure?
- How do technicians diagnose AWD coupling faults?
- Safe owner checks before ordering parts or booking a workshop
- Repair tiers, OEM parts, and UK sourcing
- Routine maintenance that prevents most coupling failures
- What does AWD coupling repair cost in the UK, and how long does it take?
- Checklist for buying OEM Haldex parts online in the UK
- Key takeaways
- Why the “replace first, diagnose later” approach costs you more
- OEM Haldex service kits, pumps, and oils for UK buyers
- Useful sources and diagnostic references
What does a failing AWD coupling feel like while driving?
Coupling symptoms often appear in a predictable pattern. Low-speed bind during a tight parking-structure turn is typically the first thing owners notice. The car feels like it is fighting itself, pulling slightly or hopping on the inside wheel. That sensation points directly to the coupling struggling to allow speed differentiation between axles.

Heat-sensitive failures are particularly telling. The system may behave perfectly when cold, then drop out after 10–15 minutes of driving. If your AWD light appears on a warm motorway run but clears after the car sits overnight, log that pattern precisely — it is a strong indicator of internal hydraulic leakage rather than a simple pump fault.
Other symptoms worth noting for a technician:
- Delayed rear engagement on a wet pull-away — the rear wheels feel uninvolved for a second or two before biting
- Driveline shudder under moderate acceleration, distinct from a tyre imbalance because it is load-dependent
- High-pitched whine from beneath the vehicle, particularly during acceleration or cornering, which signals pump cavitation or internal wear
- Clunking on engagement when pulling away from rest, suggesting worn splines or a clutch pack with excessive lash
Before assuming coupling failure, rule out worn suspension bushes and uneven tyre circumference. Both produce similar sensations and are far cheaper to fix.
What actually causes Haldex coupling failure?
Most failures trace back to one of six root causes:
- Degraded or contaminated coupling fluid. Heat and oxidation break down the specialised oil over time. Once the fluid loses its properties, friction plates abrade faster and metallic debris circulates through the pump, compounding wear rapidly.
- Worn clutch pack or friction plates. Repeated high-torque engagements — aggressive driving, towing, or sustained AWD use — glaze or thin the friction material. Glazed plates cannot generate adequate clamping force, so the coupling slips under load.
- Failed piston seals or internal hydraulic leaks. When seals degrade, the system cannot hold commanded pressure even with a healthy pump. The ECU commands high clutch pressure but the pressure sensor reads low, particularly when the unit is hot — a classic internal-leak signature.
- Pump motor or electrical faults. A failing pump produces delayed engagement, whining, and visible fluid leaks near the differential housing. Solenoid failures, wiring faults, or control-module errors can also prevent the pump from receiving correct command signals.
- Clogged filter. A blocked filter starves the pump of clean fluid, causing pressure drop and accelerated wear. This is preventable with regular service.
- Tyre mismatch. Tread-depth differences above approximately 2/32" (≈1.6 mm) force the coupling into near-constant engagement, generating heat and wear far beyond its design intent. Some manufacturers void AWD warranties for tyre mismatches beyond this threshold.
How do technicians diagnose AWD coupling faults?
A thorough diagnostic follows a clear sequence — skipping steps wastes time and money.
- Check tyres and chassis first. Measure actual tyre circumference at all four corners, not just tread depth. Inspect suspension bushes and wheel bearings. Eliminate cheap causes before touching the coupling.
- Visual fluid and leak check. Remove the drain plug and inspect for metallic debris. Dark, burnt-smelling fluid means the service interval has been missed. Fresh oil spots under the vehicle near the differential housing point to seal failure.
- Retrieve stored AWD module events. An AWD warning that self-clears still leaves a stored fault code in the control module. That code is often the decisive clue between pump/electrical faults and internal mechanical wear.
- Live-data logging during a controlled test drive. Monitor clutch pressure commanded by the ECU against actual sensor readings, pump current draw, and fluid temperature simultaneously.
- Pressure versus commanded analysis. If commanded pressure is high but actual pressure is low only when the unit is hot, the fault is almost certainly internal hydraulic leakage — not the pump.
Pro Tip: Log live data for a sustained period while reproducing the symptom rather than a brief snapshot. Pressure that drops progressively as the unit warms up is the clearest indicator of degraded clutch plates or failed piston seals inside the coupling body, not a pump problem.
Safe owner checks before ordering parts or booking a workshop
Start with safety. Park on level ground, chock the wheels, and stop any check immediately if you hear severe grinding or see active fluid loss.
- Measure tread depth at all four corners with a gauge — do not eyeball it. Even a difference above 2 mm can matter for AWD wear and warranty coverage.
- Check fluid colour through the inspection port or drain plug. Healthy Haldex fluid is typically amber or light gold. Dark brown or black fluid with a burnt smell means service is overdue.
- Listen for whining or grinding at low speed in a quiet car park. Note whether the noise changes with steering angle or load.
- Record exactly when a warning light appears — cold start, after 10 minutes, under hard acceleration — and whether it self-clears. This information is genuinely useful to a technician.
Interim measures while you arrange a repair: match tyre circumference across axles if possible, avoid sustained motorway speeds, and do not tow. Do not attempt pump internal work or clutch-pack rebuilds at home — torque-critical reassembly requires professional equipment and a scan tool for the pump basic setting procedure.
Repair tiers, OEM parts, and UK sourcing
Three repair paths cover the vast majority of Haldex coupling faults:
| Repair tier | What it involves | When to choose it |
|---|---|---|
| Service (fluid + filter + pump basic setting) | Drain old fluid, replace filter, refill with correct-spec oil, run pump basic setting via scan tool | Dark fluid, clogged filter, no mechanical noise, no pressure fault codes |
| Component repair (pump motor or seal kit) | Replace pump motor, connector set, or internal seal kit | Pump electrical fault, visible leak, pressure fault with healthy fluid |
| Full rebuild or replacement | Clutch pack, piston seals, or complete coupling unit | Internal hydraulic leak confirmed, metallic debris on drain plug, glazed friction plates |
Common OEM parts and kits to have on hand:
- Haldex service kits: oil and filter combined for your generation (1–5)
- Correct oil specification — VW/Audi applications typically require G 060 175 A2 or equivalent; always confirm for your generation
- Pump motors for your vehicle platform
- Seal repair kits for 5th-generation pumps, or sealing sets for 2nd/3rd gen
- Pressure sensors where fault codes indicate sensor failure
Haldexparts stocks OEM-grade kits for Audi, VW, Ford, Volvo, and Land Rover applications, with compatibility checking by VIN or part number. A correct-spec fluid and pump basic setting after service often restores function when the problem is contamination or filter restriction — skipping that recalibration step is the most common DIY mistake.
Routine maintenance that prevents most coupling failures
Most Haldex failures are preventable. The short list:
- Check tyre pressures and tread depth monthly. Rotate tyres regularly to maintain matching circumference across all four corners.
- Service fluid and filter at manufacturer intervals or at the first sign of dark fluid — do not wait for symptoms.
- Always perform the pump basic setting with a compatible scan tool after every fluid and filter change. Skipping this step causes erratic engagement even with fresh fluid.
- At each service, inspect the drain plug for metallic debris and note fluid colour. Metal on the plug means move from prevention to repair immediately.
Pro Tip: Measure actual tyre circumference with a tape rather than comparing tread-depth gauges alone. Two tyres of the same brand and apparent depth can have different rolling radii depending on wear pattern and inflation history. A small circumference mismatch is the most common misdiagnosis for a perceived coupling fault, and it can affect warranty coverage.
Pairing these habits with a general vehicle maintenance schedule keeps the whole drivetrain in check, not just the coupling.
What does AWD coupling repair cost in the UK, and how long does it take?
| Service scope | Typical turnaround | Key cost drivers |
|---|---|---|
| Fluid and filter service | Half a day | OEM vs aftermarket kit, scan-tool availability for pump basic setting |
| Pump motor replacement | 1 day | OEM vs remanufactured pump, labour rate, connector/seal condition |
| Full coupling rebuild or replacement | 1–2 days | Parts lead time, whether rebuild is viable, additional drivetrain work needed |
When getting quotes, ask for the diagnostic log, a parts list with OEM numbers, warranty terms on both parts and labour, and a clear policy if the repair does not resolve the symptom. A workshop that cannot produce a diagnostic log before quoting is guessing.
Checklist for buying OEM Haldex parts online in the UK
- Confirm your VIN, engine code, and transmission type before ordering — generation compatibility (1–5) matters for oil volume, filter type, and pump fitment
- Cross-reference part numbers against your vehicle’s generation; a 4th-gen filter does not fit a 3rd-gen unit
- Order the correct oil specification for your generation — never substitute a generic ATF
- Check whether a pump basic setting procedure is documented and that you have a compatible scan tool before starting
- Verify the supplier’s returns policy, proof of OEM authenticity, and delivery times
- Order spare seals, drain plug, and any connector sets at the same time to avoid a second delivery wait
- Free shipping applies on orders over £150 at Haldexparts — worth consolidating your order
Key takeaways
Most Haldex AWD coupling failures are preventable with regular fluid and filter service, correct tyre matching, and a pump basic setting after every service.
| Point | Details |
|---|---|
| Check tyres first | Measure circumference at all four corners; tread-depth or circumference differences above approximately 2 mm can trigger premature coupling wear and affect warranty coverage. |
| Read stored AWD events | A self-clearing warning light still leaves a fault code; retrieving it separates pump faults from internal mechanical wear. |
| Service fluid and filter regularly | Dark or burnt fluid and metallic debris on the drain plug mean service is overdue — act before symptoms worsen. |
| Pump basic setting is mandatory | Skipping scan-tool recalibration after a fluid change causes erratic engagement even with fresh OEM oil. |
| Haldexparts for UK sourcing | OEM-grade service kits, pump motors, oils, and filters with compatibility checking and free shipping over £150. |
Why the “replace first, diagnose later” approach costs you more
The most expensive mistake in AWD coupling repair is replacing the pump when the real fault is internal hydraulic leakage. It happens constantly. A workshop sees a pressure fault, quotes a pump, fits it, and the symptom returns within weeks because the worn clutch plates or failed piston seals were never addressed.
The diagnostic sequence matters more than the parts. Read the stored events, log live pressure data while the unit is hot, and compare commanded versus actual pressure before ordering anything. A service kit resolves a surprising number of cases that looked like pump failure — contaminated fluid restricting the filter, starving the pump of clean oil. That is a £60–£80 fix versus a £300+ pump replacement.
Tyre matching deserves the same seriousness. Practitioners consistently find that the smallest circumference mismatch is the most common misdiagnosis for a perceived coupling fault. Measure it. Do not assume identical brand and tread depth means identical rolling radius.
For UK owners, the practical path is: check tyres, read stored events, service fluid and filter with OEM-spec oil, run the pump basic setting, and only then escalate to component replacement if the fault persists. That sequence, followed in order, prevents most unnecessary parts spend.
OEM Haldex service kits, pumps, and oils for UK buyers
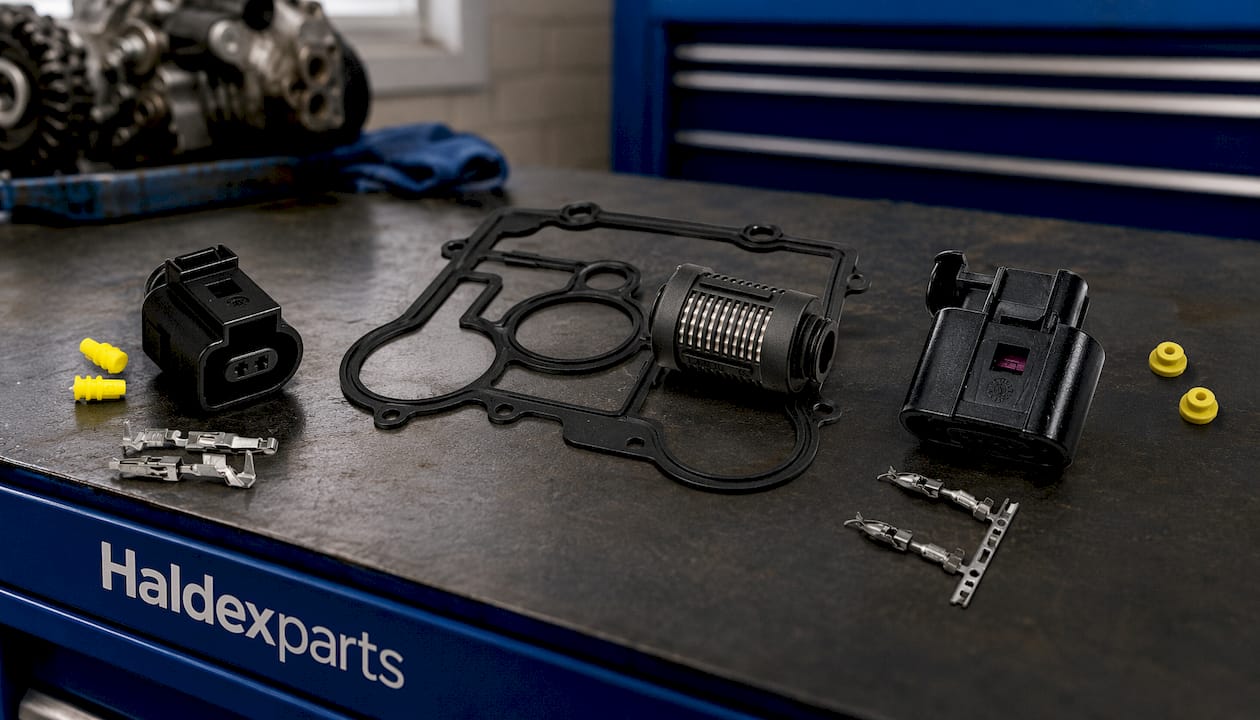
Sourcing the right parts for a Haldex system is straightforward when the supplier lists compatibility by generation and VIN. Haldexparts supplies OEM-grade service kits (oil, filter, and seals), pump motors, and Haldex-specified oils for Audi, VW, Ford, Volvo, Land Rover, and other platforms — with part numbers, generation compatibility, and technical guidance available before you order. Free shipping applies on orders over £150, which typically covers a full service kit and oil. Double-check your VIN and generation before ordering, add spare seals and a drain plug to your basket, and confirm you have a scan tool capable of running the pump basic setting. If your diagnostic log points to internal wear rather than a service issue, the team can advise on the correct seal kit or pump for your application. Browse the full parts catalogue or go straight to the relevant collection for your vehicle.
Useful sources and diagnostic references
Key technical references used in this article:
- AWD coupling wear identification guide (VW/Audi Haldex) — heat-sensitive failure patterns, pressure diagnostics, and pump basic setting guidance
- Signs of a failing AWD coupling oil pump — symptom descriptions and visual inspection cues
- Tyre safety and fitment guidance — tread-depth thresholds and AWD warranty implications
- Haldexparts.co.uk — OEM service kits, pump motors, oils, filters, and compatibility checking for UK buyers
For a workshop visit, bring: your scan tool’s diagnostic log (stored events and live pressure data), photos of drain-plug debris and fluid colour, and your tyre circumference measurements. For uncommon fitments or generation queries, Haldexparts’s technical support can advise on correct part numbers before you order.
This article is general technical information, not professional mechanical advice. Confirm specifications and repair procedures with a qualified technician or the relevant manufacturer documentation for your specific vehicle.