

Yes, in many cases you can remove a stuck Haldex filter safely yourself, provided the pump still turns and the housing isn’t badly corroded. Most sticking cases come down to a swollen O-ring or a plastic cap that’s seized against alloy over years of heat cycling. That’s a mechanical problem, not an electrical one, and it usually yields to patience, penetrating oil, and the right leverage rather than raw force.
Before you touch a spanner, get three things straight:
- Do: secure the car on axle stands, lay down an oil containment tray, and have the correct filter kit and O-rings ready before you crack anything open.
- Do: work slowly through penetrating oil and gentle leverage first, checking progress after each attempt.
- Don’t: force a stripped bolt head, a distorted housing, or a pump that won’t rotate at all. Any of those three means stop and get it looked at by a specialist, because you’re now one wrong move from turning a £40 filter job into a pump replacement.
Key Takeaways
A stuck Haldex filter is usually a mechanical seizing problem solvable with penetrating oil, leverage, and patience, not force, provided the pump still turns freely.
| Point | Details |
|---|---|
| Verdict on DIY removal | Most stuck filters come free with penetrating oil, the screw and lever trick, and patience if the pump isn’t seized. |
| Stop signs | Stripped fasteners, a seized pump that won’t rotate, or heavy corrosion mean stop and consult a specialist. |
| Diagnose properly, not generically | Use VCDS or OBDeleven, not a generic OBD-II reader, to see actual Haldex module fault codes. |
| Confirm the fix worked | Run V181 pump output and N373 valve tests, and check motor resistance sits around 5 to 8 ohms. |
| Replace as a set | Fit filter, oil, and pump together when wear is confirmed; Haldexparts stocks generation-matched OEM-grade kits for the job. |
Table of Contents
- Haldex filter stuck symptoms and when DIY makes sense
- Getting your workspace and tools ready before you start
- How to remove and replace a Haldex filter step by step
- Escalation ladder for a genuinely stuck filter
- Checking your work: pump diagnostics after the job
- How often you should service Haldex to avoid this happening again
- Which Haldexparts kit matches your Haldex generation
- What most DIY guides get wrong about this job
- Get the right Haldex kit before you start the job
- Frequently asked questions
- Sources
Haldex filter stuck symptoms and when DIY makes sense
A Haldex system that’s struggling to engage rarely announces itself with one obvious fault. It tends to show up as a pattern of small annoyances that add up.
- Delayed all-wheel-drive engagement pulling away from a standing start, especially in the wet
- ABS or traction control warning lights that come and go, often after cornering hard
- A faint clunk or momentary wheel skip when power transfers to the rear axle
- Clutch slip under load, felt as a brief hesitation before the rear wheels bite
Generic OBD-II readers usually can’t see into the Haldex control module at all, so a scan that comes back “no faults” doesn’t mean the system is healthy. You need something like VCDS or OBDeleven to pull the actual Haldex-specific codes and run live data, which is the only reliable way to distinguish a clogged filter from a failing pump or a dying control valve.
Three signs mean this isn’t a DIY job any more: a pump that physically won’t rotate by hand, heavy white or green corrosion crusting the housing, or fasteners that have already stripped before you’ve applied real force. Push past any of those and you risk turning a filter change into a full pump replacement.
Getting your workspace and tools ready before you start
Haldex work is straightforward, but only if you’ve set up properly first. Rushing the prep is where most DIY jobs go wrong.
Jack the car at the manufacturer’s rated points, support it on axle stands, and chock the wheels that stay on the ground. Wear gloves and eye protection. Haldex oil isn’t especially nasty, but you don’t want it in your eyes when you’re working upside down under a wheel arch. Keep the workspace level and clear, and have a waste oil receptacle plus rags ready before you loosen anything, since old fluid tends to run the moment a plug comes free.
- Spray the cap and surrounding fasteners with penetrating oil and leave it to work while you set up everything else.
- Get a short 6mm wood screw and a pair of needle-nose pliers ready for the extraction trick if the cartridge won’t pull by hand.
- Lay out sockets, a torque wrench, a small pry bar, and a couple of picks for O-ring removal.
- Have a syringe ready for refilling; it’s the only practical way to get the exact fill volume back into a small housing.
- If you’ve got access to the manufacturer service tool, keep it to hand, though most Gen2 to Gen4 jobs don’t strictly need it.
Order your parts before you start, not halfway through. That means the correct filter kit for your Haldex generation, new drain and fill plug seals, fresh O-rings, and the full oil quantity specified for your unit.
Pro Tip: Buy one full oil volume more than the spec calls for. Haldex housings trap air pockets, and topping up mid-job with no spare bottle on the shelf is a frustrating way to lose an afternoon.
How to remove and replace a Haldex filter step by step
This covers the routine case, where the filter is stiff but not properly seized. If the pump won’t turn by hand at all, skip ahead to the escalation section rather than forcing it.
Preparation and draining
- With the car supported and chocked, loosen the fill plug first, before you drain anything. If it won’t budge, you’ll want to know that now rather than after the housing is empty.
- Position your oil tray under the drain plug, remove it, and let the fluid run out fully.
- Inspect the drained oil. Metallic glitter or thick black sludge tells you the pump has been working hard against resistance, which changes what you’re looking for once the cap comes off.
Removing the cap and cartridge
Undo the cover screws holding the filter cap in place, working in a cross pattern rather than one side at a time, to avoid warping the cover. Once it’s free, the filter cartridge often lifts straight out with needle-nose pliers or a pick. If it doesn’t move on the first firm pull, don’t keep yanking.
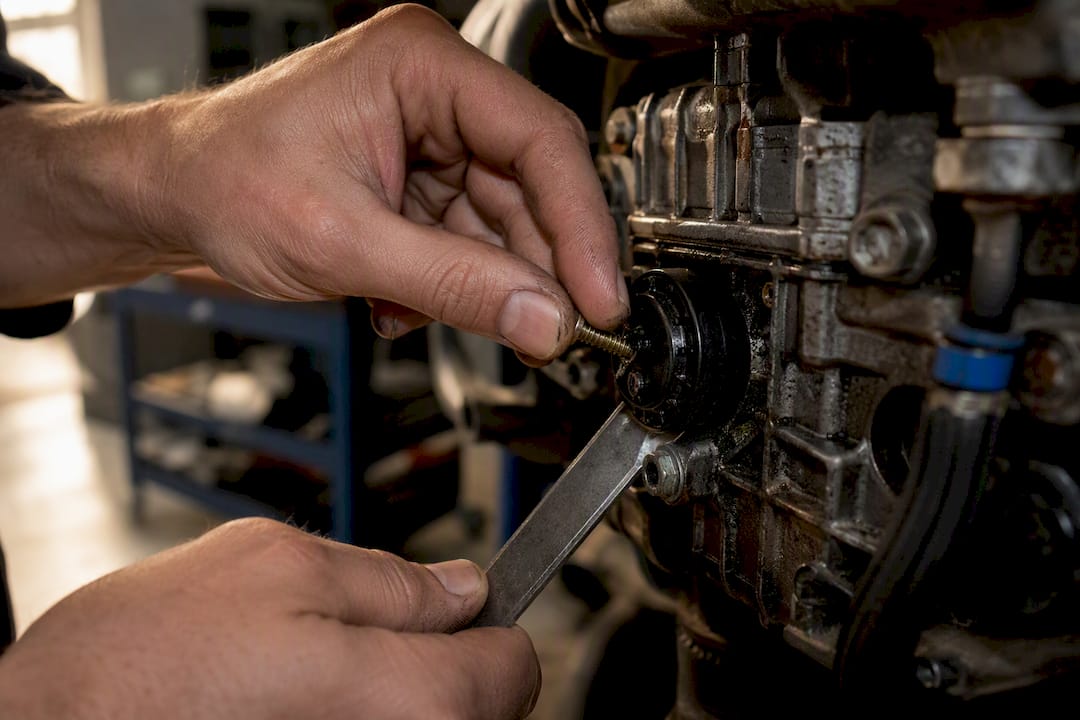
This is where the screw trick earns its reputation among forum regulars. Drive a short 6mm wood screw straight down into the centre of the plastic filter cap, just far enough to bite. Then use a nearby bolt head on the housing as a fulcrum and lever against the screw head with a small bar or the claw of a hammer. It converts a straight pull, which the cap resists, into a rocking motion that breaks the seal gradually. Forum write-ups on Gen4 filter changes document this as one of the most consistently successful non-destructive methods for a stuck cartridge.
Cleaning, fitting, and refilling
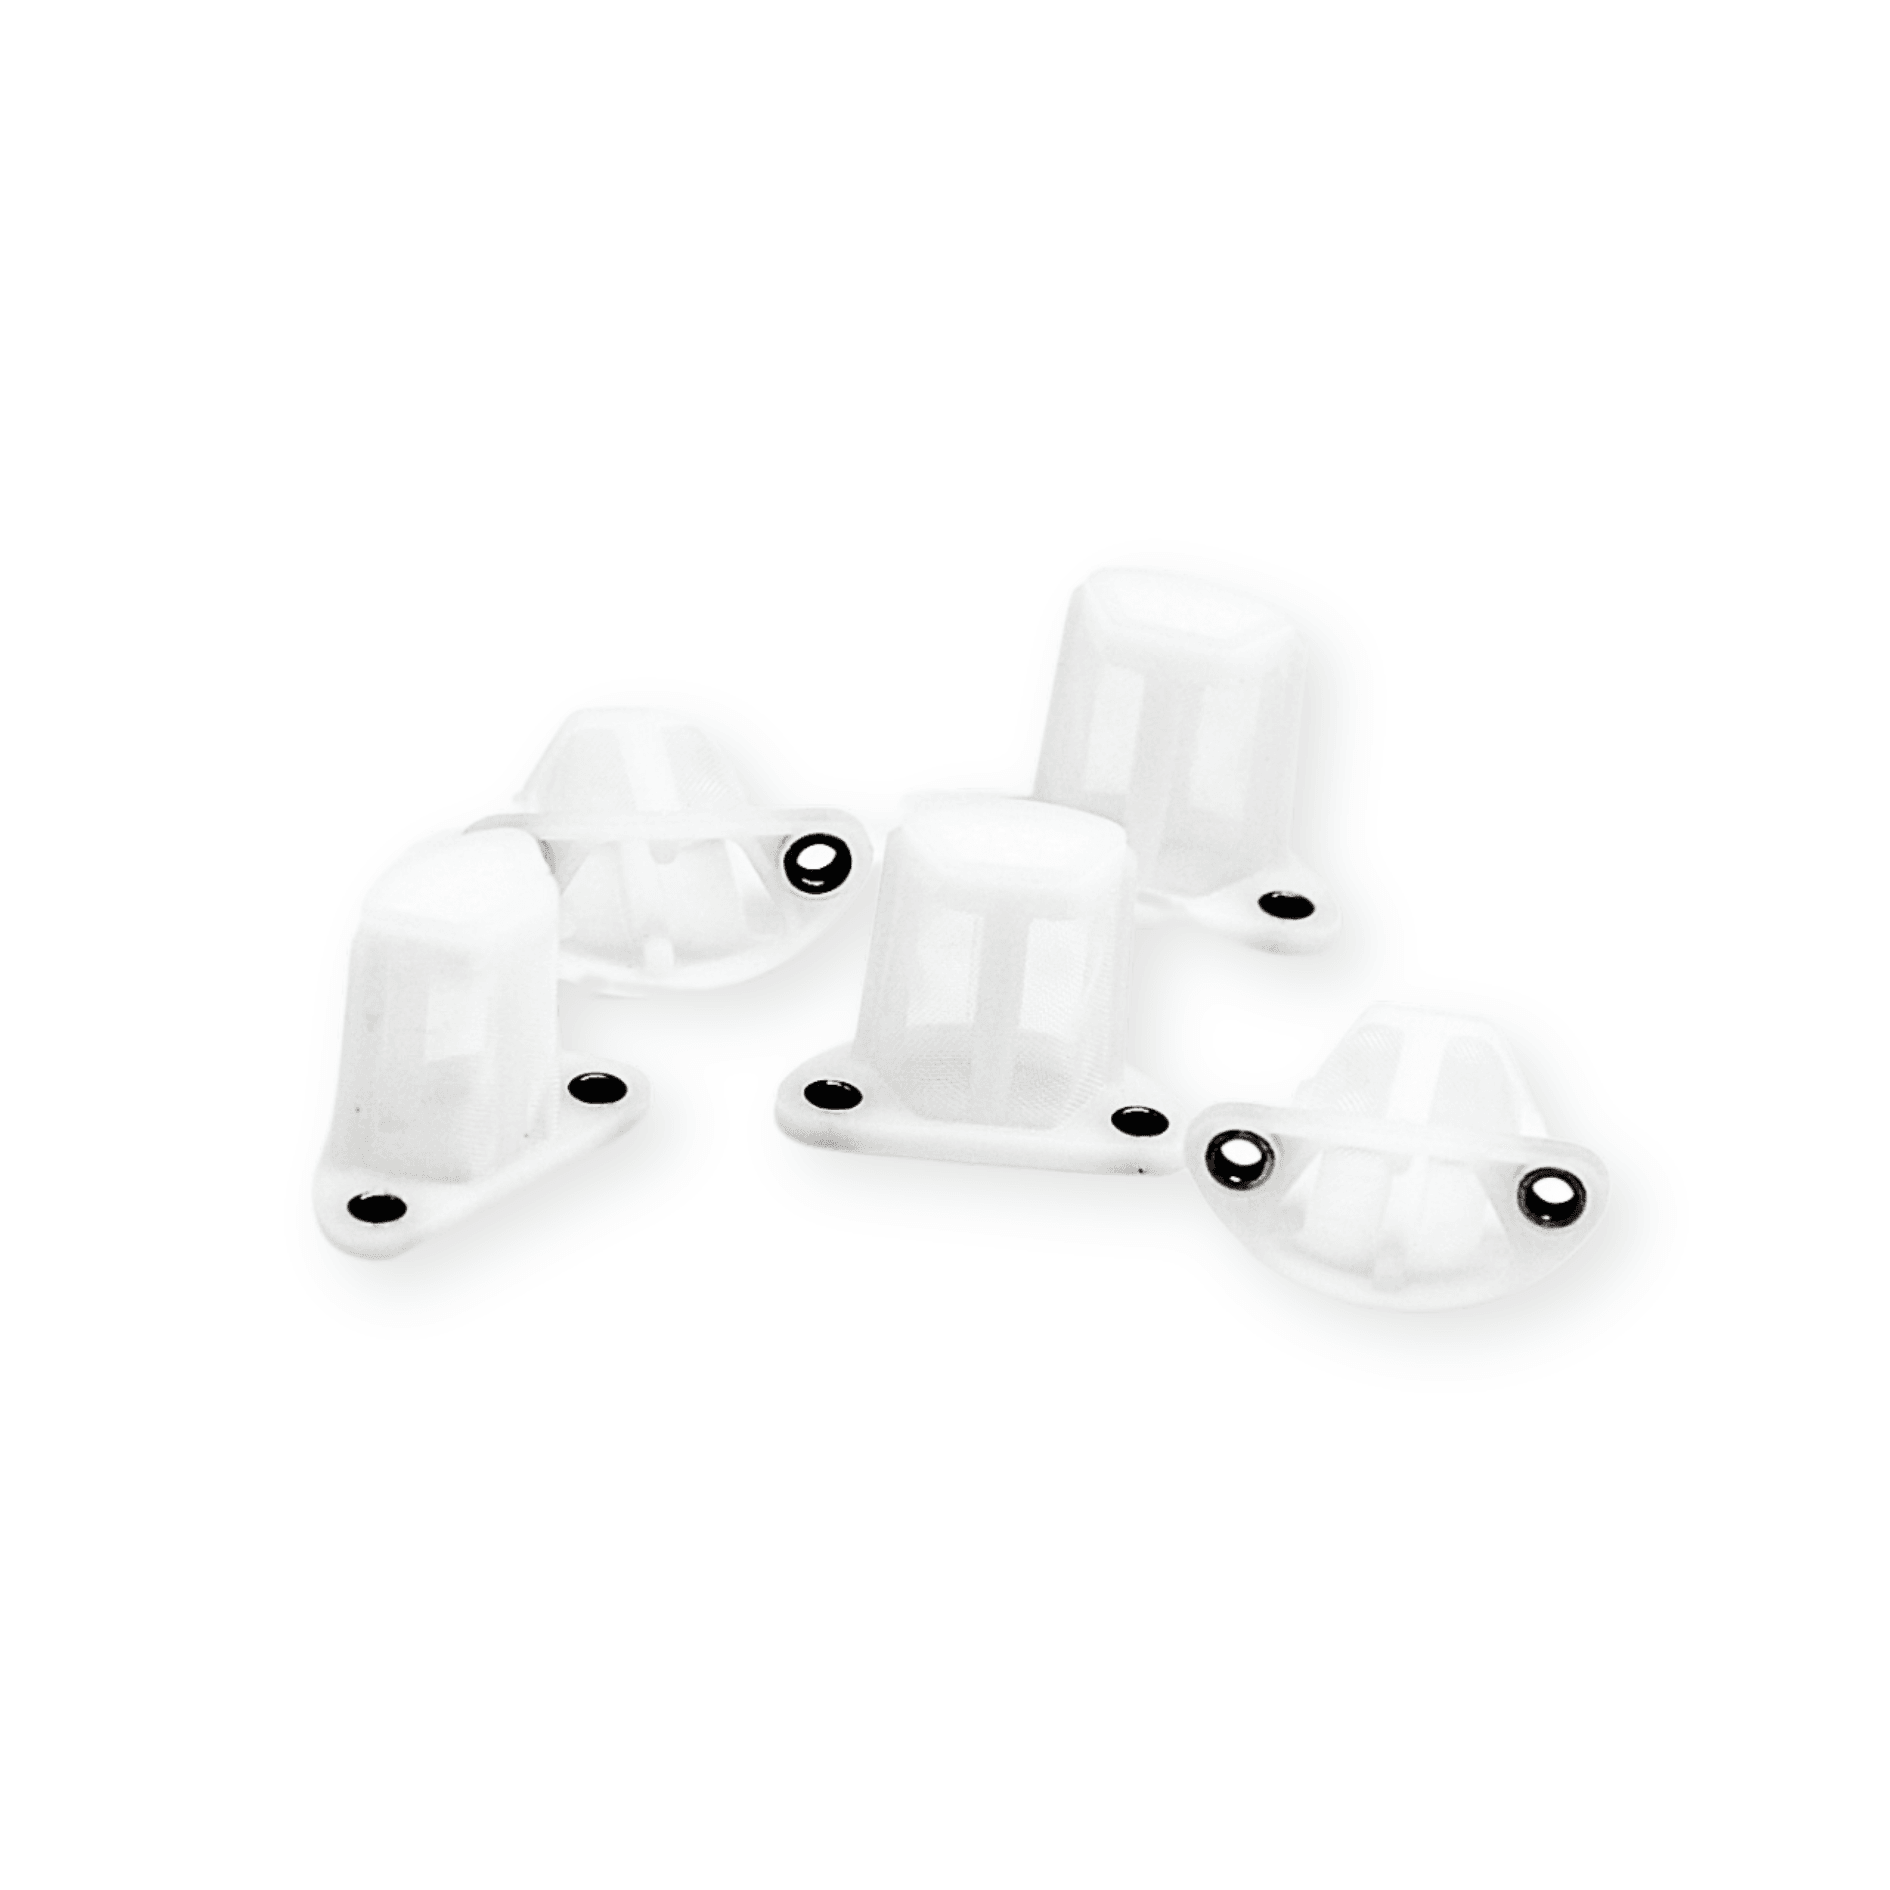
Once the old filter is out, clean the mating surfaces thoroughly. Debris left in the housing lip is a common reason a fresh filter still leaks or a new pump fails within months. Fit the new filter and pre-filter strainer if your generation uses one, seat new O-rings on the drain and fill plugs, and torque everything to spec rather than “snug.”
Refilling a Haldex housing by pouring is nearly impossible given the small fill port, so use a syringe to draw up the specified oil volume and inject it slowly, letting air escape as you go. With the plugs fitted, run the pump output test through VCDS or OBDeleven and watch the fill port until oil actually appears there, confirming the pump is drawing and pushing fluid properly rather than just spinning. Only then lower the car, let it settle to a level stance, and top up to the correct mark.
Escalation ladder for a genuinely stuck filter
If the basic pull and the screw trick haven’t shifted it, work through these in order rather than jumping straight to force.
- Soak and repeat. Re-apply penetrating oil generously around the cap and bolt threads, then leave it overnight rather than 20 minutes. Corrosion bonds don’t always break on the first application.
- Localised heat. A heat gun on the metal housing (never the plastic cap itself) for a short burst can expand the alloy fractionally and break the grip. Keep heat away from seals, wiring, and the pump’s electronics, and never use an open flame near oil residue.
- The start pressure trick. With the fill plug removed and the system otherwise reassembled, briefly running the pump via VCDS can build enough internal pressure to help push a stubborn cartridge loose. This only works if the pump itself is known to be healthy; running a compromised pump against resistance risks damaging it further.
- Mechanical leverage that protects the housing. Use a lower bolt head as your fulcrum point rather than prying directly against the pump nose or housing lip, which is soft alloy and easy to distort.
Pro Tip: If you’re reaching for a hammer at any point in this process, stop. Every successful stuck-filter fix in the write-ups we’ve reviewed relied on leverage and patience, never impact.
Cutting the cap off is the genuine last resort, reserved for cases where corrosion has fused it solid. If you get there, document the mounting points with photos before you cut, because you’re almost certainly heading towards a full pump assembly replacement rather than a simple filter swap.
Checking your work: pump diagnostics after the job
A filter change that looks fine on the bench can still hide a pump on its way out, so don’t skip the diagnostic pass once everything’s reassembled.
Run the V181 pump output test and the N373 control valve test through VCDS or OBDeleven. A healthy pump builds pressure smoothly and the valve responds crisply to commands; hesitation, stalling, or a fault code logging mid-test both point to a component that’s struggling rather than one that’s simply been starved of clean oil.
If you’ve got a multimeter to hand, checking pump motor resistance is worth the two minutes it takes. Community fault-finding threads put a healthy reading in the region of 5 to 8 ohms, with erratic or fluctuating values usually indicating worn brushes inside the motor rather than something you can fix with fresh oil.
- Persistent ABS or TCS warnings after the service point to something beyond a simple filter block
- Continued clutch slip during cornering suggests the pump still isn’t building adequate pressure
- Erratic engagement that comes and goes intermittently often tracks back to the same worn brush issue a resistance test reveals
If the pump itself is confirmed failing, replace the pump, filter, and oil together. Fitting a new pump into a housing still carrying contaminated fluid and a tired filter is a fast route to burning out the replacement within weeks.
How often you should service Haldex to avoid this happening again
Manufacturers frequently describe Haldex fluid as a lifetime fill, but that claim doesn’t survive contact with real-world mileage. Independent service guidance settles on roughly every 30,000 to 40,000 miles, or every three to four years, whichever comes first, as a sensible proactive interval regardless of what the handbook says.
- Change the filter every time you change the oil, not on some alternate schedule
- Inspect and replace the pre-filter strainer whenever you’re fitting a new pump, since a clogged strainer is what killed the old one
- Use the OEM-specified oil grade rather than a generic substitute, since Haldex fluid has friction properties tailored to the clutch pack
- During any routine service, glance at the housing for early corrosion streaks or a filter cap that’s already gone slightly stiff to turn
Catching a slightly sticky cap at a routine service costs you five minutes with penetrating oil. Leaving it another two years is what turns into the seized, corroded mess covered in the escalation section above. For a broader look at how these failures develop over time, Haldexparts’ guide to what causes Haldex failure is worth a read before your next service is due.
Which Haldexparts kit matches your Haldex generation
Getting the right part number matters more than most DIYers expect, since Haldex hardware has changed substantially across five generations and several manufacturer applications.
- Gen4 VW, Audi, Seat, and Skoda applications use Filter 111358, commonly paired with BorgWarner’s 850ml original oil in a combined kit.
- The 1st generation precharge pump 02D525557 covers early Audi TT and VW R32 applications, distinct from later Gen2 hardware.
- Porsche and Audi R8 owners need the 5th generation pump 9P1906271 or 0D4906271A respectively, which aren’t interchangeable with mainstream VAG parts.
- SAAB, Opel, Vauxhall, Buick, and Cadillac AWD systems take the BorgWarner coupling filter kit 20986573, while the rear differential on the same platforms uses the 22765779 oil pump and 2098657 filter kit.
- Volvo’s S60, V70, XC60, and XC90 range runs on the 31325173 filter and 31367940 coupling oil kit.
Replacing filter and oil together, and the pump too where wear is confirmed, is the only way to stop a new part failing prematurely inside contaminated fluid. Order the full kit, matching plug seals, and a syringe before you start, so a missing O-ring doesn’t leave the car on stands overnight.
What most DIY guides get wrong about this job
Most guides treat a stuck Haldex filter as either trivial (just pull it out) or terrifying (call a specialist immediately). Neither is honest. The reality sits in the middle: this is a job that rewards patience and punishes force, and the difference between a five-minute fix and a written-off pump is almost always how many times you tried to muscle through resistance before stopping to think.
The screw and lever trick gets the most attention online, and it deserves it, but it’s overrated as a first move. Penetrating oil left overnight solves more stuck filters than any leverage technique, simply because most people don’t give it long enough to work. Where the conventional advice really falls short is on diagnostics. Plenty of DIYers change the filter, refit everything, and never confirm the pump is actually pumping properly afterwards. Running a proper output test with VCDS or OBDeleven takes ten minutes and tells you whether you’ve fixed the problem or just delayed it.
Prioritise the resistance test and pump output check before you call the job done. A filter change that doesn’t confirm pump health isn’t finished, it’s just optimistic.
Get the right Haldex kit before you start the job
Haldexparts exists precisely for the moment you’ve drained the old fluid and need the correct, OEM-grade filter, oil, and seals sitting on the bench rather than guessing at a generic part number. Every kit is matched to a specific Haldex generation and vehicle application, so you’re not stuck cross-referencing forum threads to work out whether a Gen2 pump fits your car.
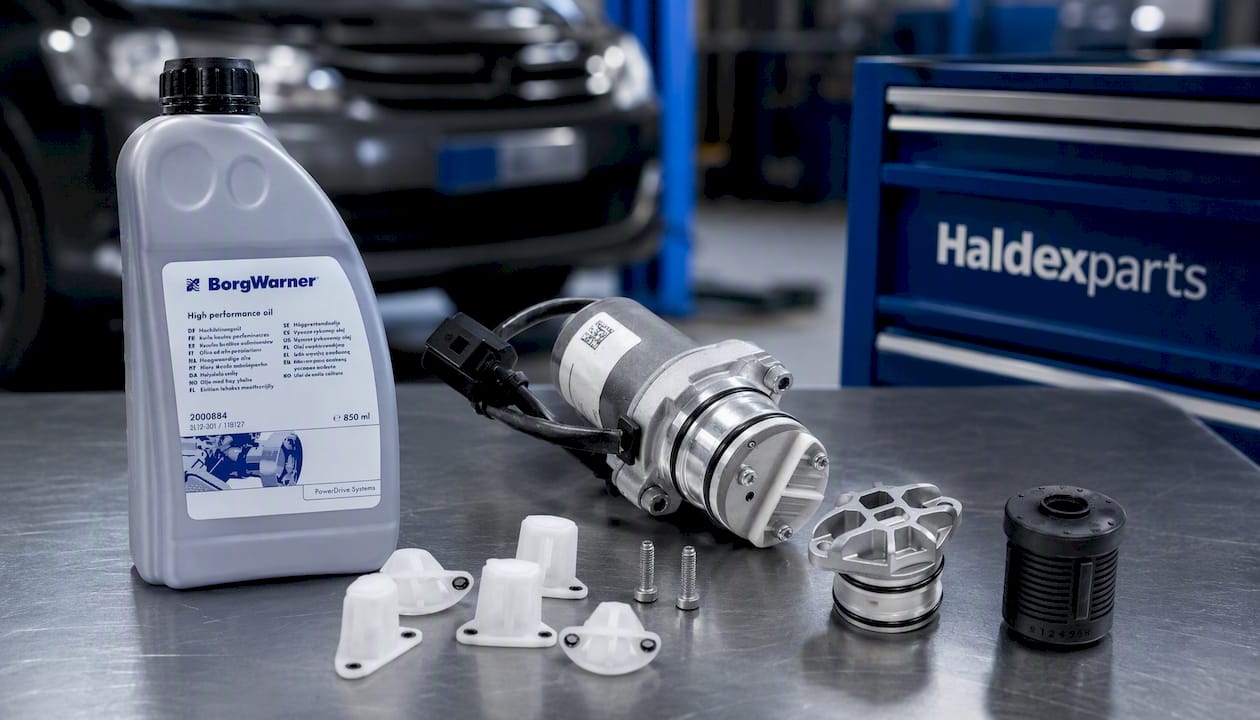
Orders over £150 ship free, which covers most complete filter and oil kits outright, and product pages list exact part numbers and fitment so there’s no ambiguity before checkout. If your diagnostics point to a pump on its way out rather than just a tired filter, the BorgWarner Gen2 pump, filter, and oil kit bundles everything needed to do the job once, properly, rather than twice. Browse the Haldex service kits collection for your generation and get the parts ordered before you jack the car up.
Frequently asked questions
Can I drive with a stuck Haldex filter? You can drive, but expect delayed AWD engagement and possible ABS or TCS warnings. Driving for extended periods risks accelerating pump wear from restricted oil flow.
What causes a Haldex filter to get stuck in the first place? Age hardens the O-rings and fine corrosion forms between the plastic cap and alloy housing over years of heat cycling, effectively gluing the two together.
Is it safe to use heat to free a stuck Haldex cap? Localised heat on the metal housing works well, but keep it away from the plastic cap itself, seals, and any wiring, and never use an open flame near oil residue.
How do I know if my Haldex pump needs replacing rather than just a filter? Check motor resistance with a multimeter. A healthy pump reads around 5 to 8 ohms; erratic or high readings point to worn brushes needing pump replacement.
Do I need the official Haldex service tool to do this job? Most Gen2 to Gen4 filter jobs are achievable with standard hand tools and the screw and lever technique. The manufacturer tool helps but isn’t strictly essential.