

Small, dark, granular flakes in Haldex fluid are usually harmless clutch dust from normal wear. Bright, shiny metallic swarf, or debris in large quantities, is not — it points to pump or coupling damage that needs attention before you drive further.
Do three things before anything else:
- Photograph the flakes against a white background and keep a small fluid sample in a sealed container.
- Check for a lit AWD or traction warning light, and note any loss of rear-wheel engagement.
- Read fault codes with a scanner that supports Haldex, not just generic OBD-II.
Pro Tip: If the fluid smells burnt or looks grey and gritty rather than dark and fine, stop driving hard through corners or launches until the unit has been checked. That texture usually means metal-on-metal contact, not routine friction wear.
Key Takeaways
Fine dark clutch dust in Haldex fluid is expected wear; bright metallic swarf, recurring debris, or fault codes mean the pump or coupling needs inspection before further driving.
| Point | Details |
|---|---|
| Judge debris by type | Dark, fine, non-magnetic dust is normal clutch wear; bright magnetic filings are not. |
| Sample before you act | Photograph and keep a labelled fluid sample plus any scanned fault codes before booking a repair. |
| Match repair to debris | Filings usually mean pump replacement; coarse shards usually mean clutch pack or coupling work. |
| Screen checks matter | A fluid change alone won’t fix a blocked pump screen restricting pressure. |
| Buy for the generation | Haldexparts kits are matched by vehicle and Haldex generation, from filters to full pump and oil sets. |
Table of Contents
- What causes Haldex metal shavings in the fluid
- When metal shavings signal a bigger problem
- Inspecting the unit and taking a proper fluid sample
- Reading the debris: what it tells a technician
- Matching the repair to the right Haldex parts
- Keeping shavings from building up in the first place
- Frequently asked questions
- Sources
What causes Haldex metal shavings in the fluid
Most debris you’ll find during a service is clutch material, not metal at all. Haldex couplings rely on a wet clutch pack that engages and slips slightly to send drive to the rear axle, and that friction material sheds fine dark particles over tens of thousands of miles. It feels gritty between your fingers, doesn’t stick to a magnet, and settles as a fine sludge at the bottom of the sump.
True metal shavings look and behave differently. They’re bright, sometimes glittery, and a simple magnet test will pull ferrous particles straight out of the sample. Owner forums are full of exactly this debate. Threads on the Audi S3 forum show owners posting photos of “glitter” in their fluid, with the community consistently asking the same questions: how much, what colour, and any symptoms alongside it.
Generation matters too. Earlier Haldex units (roughly Gen 1 to Gen 4) use a replaceable filter that catches debris before it recirculates. Later generations rely on an internal gauze screen fitted to the pump itself, which means debris tends to collect closer to the pump housing rather than in an accessible filter canister.
- Fine, dark, non-magnetic dust: clutch material, expected over time.
- Bright, magnetic filings: pump or shaft wear, needs investigation.
- Rust flakes or gritty black paste: contamination from a failed shaft seal or old fluid never having been changed.
When metal shavings signal a bigger problem
Not all debris carries the same weight. Context and quantity decide whether you’re looking at routine maintenance or the start of a failure.
- Normal: A light dusting of dark clutch dust at a scheduled service, especially past 60,000 miles, with no drivability changes.
- Watch closely: Slightly heavier deposits that reappear at every service but stay dark and fine, with the vehicle otherwise performing normally.
- Concerning: Shiny metallic swarf appearing in noticeable quantity, fluid that’s dark and smells burnt, or debris that returns quickly after a fresh service.
- Urgent: Any of the above alongside a lit warning light, a clunk or hesitation on take-off, or stored fault codes relating to pump pressure or coupling slip.
Fault indicators worth checking for include low system pressure codes, implausible pump signal faults, and rear-axle torque limitation messages. Dirty oil and a blocked pump screen can prevent the unit from building pressure at all, which is exactly the mechanism behind several of these codes. If you see metal alongside any fault code rather than metal on its own, treat it as the more serious end of that scale.
Inspecting the unit and taking a proper fluid sample
Working under the vehicle means axle stands rated for the weight, not a jack alone, and eye protection when draining fluid under any residual pressure.
- Warm the vehicle briefly so fluid drains cleanly, then position a catch tray under the Haldex sump plug.
- Drain into a clean, clear container rather than a dark drain pan, so colour and particle size stay visible.
- On Gen 1 to Gen 4 units, remove the accessible filter housing and inspect the element directly. On later generations, expect to remove the pump to access the internal gauze screen, a job DIY guides for Gen4 pump servicing describe in detail, with torque values and seal replacement steps.
- Run a magnet along the base of the sample container. Anything that jumps or clings is ferrous.
- Plug in a scanner capable of reading Haldex-specific codes, not just engine codes, before you reassemble anything.
Pro Tip: Label the sample with mileage and date, and keep it even after the service. If a workshop later disputes what they found, a dated, labelled sample from before the repair is hard evidence.
Reading the debris: what it tells a technician
The type of particle in the fluid is a reasonably reliable map to the repair you’ll need.
- Fine dark friction dust: routine clutch wear. Clean or replace the filter, refill with correct fluid, and recheck at the next interval.
- Bright, fine metallic filings: usually early pump or drive-shaft wear inside the coupling. Often resolved with a pump replacement rather than a full coupling swap.
- Coarse shards, curls, or visible scoring on magnetic material: points to clutch pack plate damage or coupling housing wear. This typically means opening the unit for a friction plate or full clutch pack replacement, a bigger job than a fluid and filter service.
- Gritty black paste with a burnt smell: fluid has broken down from heat cycling, often after the unit ran low or contaminated for an extended period. Expect a full flush alongside whatever mechanical repair the debris points to.
Effort scales roughly with particle size: fine dust is an afternoon service, filings usually mean ordering a pump, and shards mean the unit is coming off the vehicle.
Matching the repair to the right Haldex parts
Once you know what the debris is telling you, the parts side is straightforward if you buy for the correct generation and application.
For minor contamination with fine friction dust, a filter and fluid change is usually enough. Volvo owners running 2003 to 2010 platforms can use the AOC oil filter and BorgWarner 850ml oil kit, while 2011 to 2014 Volvo AWD models pair with the BorgWarner AOC filter and 850ml oil kit. Broader S60, S80, V60, V70, XC70, XC60, and XC90 applications can use the BorgWarner AOC filter assembly, and the combined Volvo oil filter and coupling oil kit covers both parts in one order.
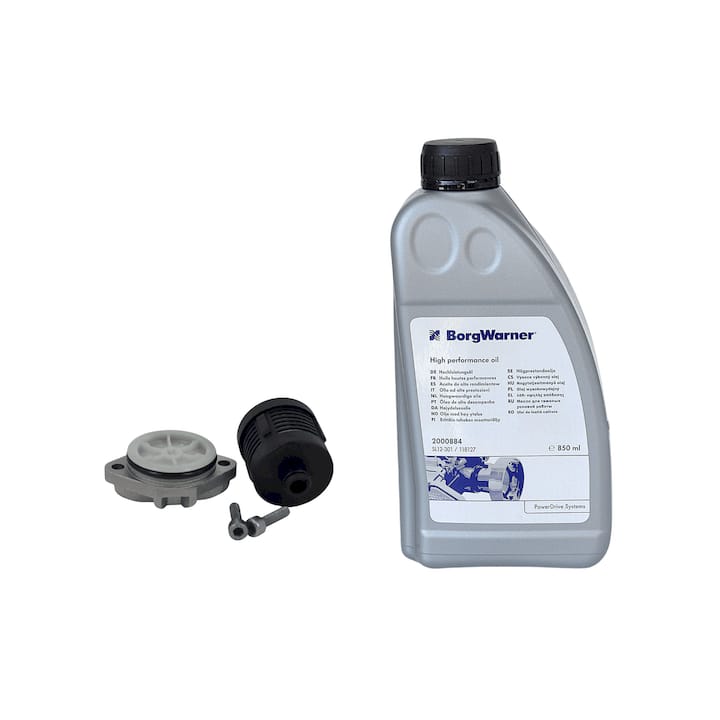
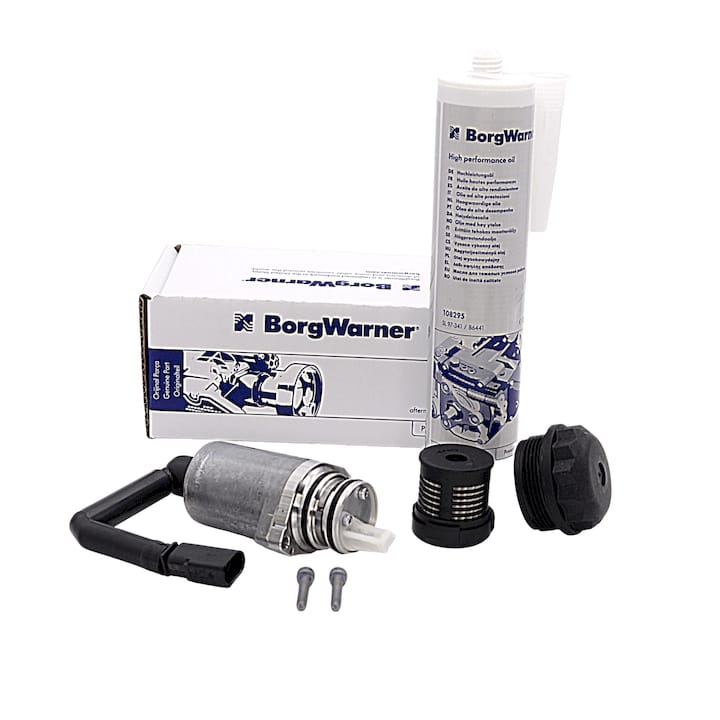
Where filings point to pump wear, replacement is the sounder repair than a clean and hope. Audi, VW, Škoda, and Seat owners on 2nd generation units can use the BorgWarner pump, filter and oil kit, and SAAB, Opel, Vauxhall, Buick, and Cadillac owners have the BorgWarner coupling filter kit 20986573. Anyone tackling a pump nose repair rather than a full unit swap should check the pump nose replacement tips for 1st and 2nd generation pumps before ordering.
| Debris found | Likely cause | Typical fix |
|---|---|---|
| Fine dark dust | Normal clutch wear | Filter and fluid change |
| Bright metallic filings | Pump or shaft wear | Pump replacement kit |
| Coarse shards | Clutch pack damage | Friction plate or coupling rebuild |
Always confirm oil volume and seal part numbers against your specific vehicle before ordering. A kit built for the wrong generation won’t seat properly, and using the wrong fluid viscosity can leave the coupling underperforming even after a correct-looking service.
Keeping shavings from building up in the first place
Haldex units aren’t maintenance-free, and stretching intervals is the single biggest driver of the metallic swarf cases you actually need to worry about. Most manufacturers specify service at regular intervals, but vehicles used for towing, track days, or frequent low-traction driving should come forward on that.
- Avoid repeated hard launches from a standstill, which load the clutch pack harder than normal acceleration.
- Don’t ignore a slightly noisy or hesitant AWD system, waiting rarely makes a marginal fault cheaper to fix.
- During service, clean the pump screen properly rather than just topping up fluid, since a blocked screen restricts flow even with fresh oil in the system.
- Fit a new copper sump washer every time, torque to spec, and use OEM-spec Haldex fluid rather than a generic substitute.
- Clear stored fault codes after service and take a short test drive to confirm the system re-engages properly.
Understanding why Haldex oil degrades in the first place makes it easier to judge whether your interval is actually tight enough for how the vehicle gets driven.
Technician’s notes and common pitfalls seen in workshops
The mistake that comes up again and again is treating a fluid change as the whole job. Refilling without checking the screen leaves the real restriction in place, and the fault often returns within weeks. Wrong fluid viscosity is the second most common error, usually from someone reaching for whatever gear oil was on the shelf.
One glittery sample rarely means much on its own. Two or three in a row, or metal alongside a fault code, is when it’s worth pulling the pump rather than guessing again.
Finding the right kit for your Haldex generation
There are other routes to sorting a metallic sample. A general parts counter, a dealer service department, or trial and error with mismatched components will all technically get fluid into the unit. None of them guarantee the filter, oil viscosity, and seals actually match your Haldex generation, which is where most repeat failures start.
Haldexparts builds kits around the vehicle and generation, not a generic part number. The 4th generation pump, filter, and oil kit for VAG platforms bundles everything needed for a pump swap in one order, and the BorgWarner seal repair kit with G055175A2 oil for 5th generation units covers the seals most DIY jobs forget until the unit weeps afterwards. Orders over £150 ship free, and every listing states the exact vehicle and generation fitment so you’re not left guessing whether a part number applies to your car. Browse the full range of service kits by generation, or search by vehicle to find the pump, filter, and oil combination that matches what your sample just told you.
Frequently asked questions
Is it normal to find metal shavings in Haldex fluid? Small amounts of dark clutch dust are normal at service. Bright, shiny metallic swarf or a heavy build-up is not, and points to pump or coupling wear.
Can I just change the fluid and ignore the flakes? Only if the debris is fine, dark, and non-magnetic. Anything metallic or accompanied by fault codes needs the pump screen inspected, not just a fluid top-up.
How often should Haldex fluid be changed to prevent debris build-up? Most manufacturers recommend every 30,000 to 40,000 miles, shortened for towing, track use, or frequent low-traction driving.
What’s the difference between Haldex generations when it comes to filtering debris? Earlier generations use a replaceable filter accessible without removing the pump; later generations use an internal gauze screen that requires pump removal to clean.
Sources
- Haldex oil change service guide - Mechalex
- Freelander 2 (LR2) - DIY Haldex Gen4 service guide | LandyZone