The Haldex oil drain plug is the access point for draining and replacing the fluid inside your vehicle’s Haldex all-wheel drive coupling unit. Correct removal and refitting of this plug is the single most critical step in any Haldex service. Skip it, rush it, or do it in the wrong order and you risk a seized fill port, a stripped thread, or a dry AWD system. This haldex oil drain plug removal guide covers every step from tools to torque, so you get it right the first time. Haldex systems require servicing every 30,000 km under normal conditions. Haldexparts stocks the OEM drain plugs, washers, and oils you need to do this job properly.
What tools and preparation do you need for Haldex oil drain plug removal?
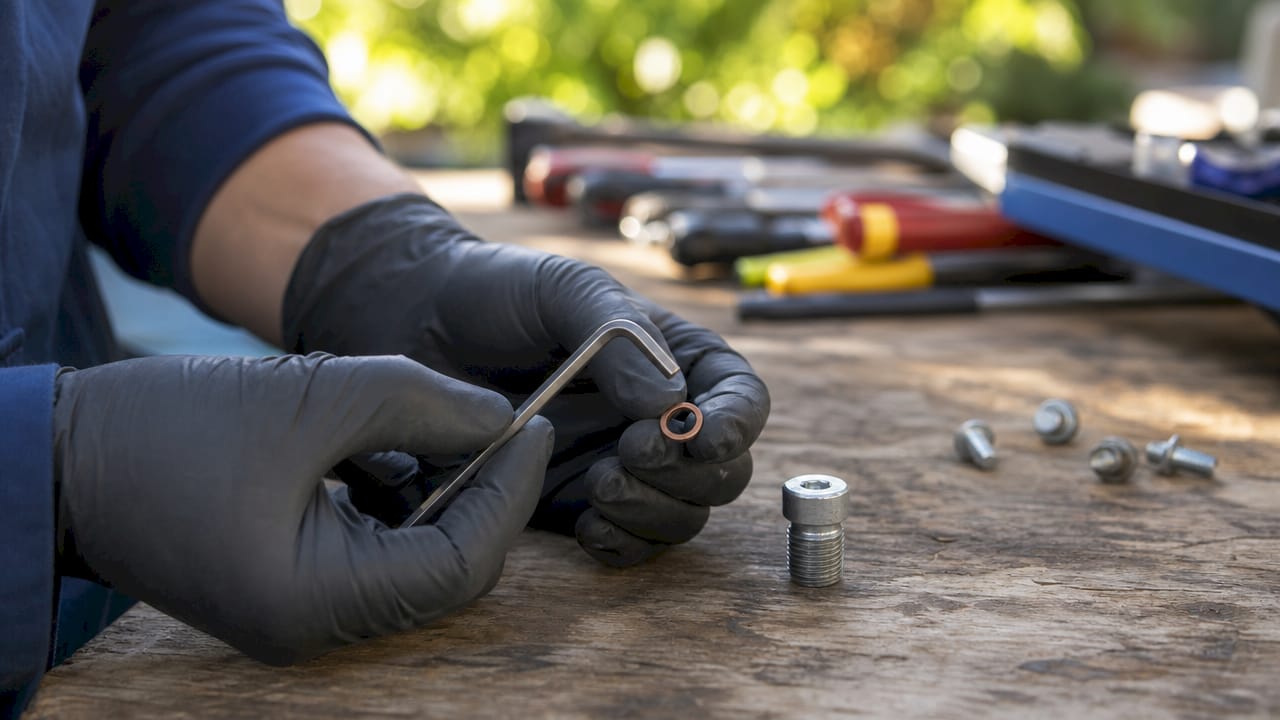
Preparation is the difference between a clean 45-minute job and a stripped thread that costs you a new housing. Gather everything before you lift the car. Stopping mid-job to hunt for a tool is how mistakes happen.
Essential tools
- 8mm Allen/HEX key (or a 1/4-inch drive socket with an 8mm hex bit): this is the correct tool for the drain plug on most Haldex generations
- 5mm Allen key: used for the fill plug on 4th and 5th generation units
- Torque wrench: capable of reaching 30 Nm accurately
- Oil catch pan: minimum 1-litre capacity, positioned directly beneath the coupling unit
- Replacement drain plug and copper or aluminium washer: never reuse the old washer
- Clean lint-free cloths: for wiping the drain port and plug threads
- Nitrile gloves and eye protection: Haldex fluid is an irritant
For the oil itself, you need a fluid that meets the correct specification for your generation. The right Haldex oil matters more than most DIY guides admit. Using a generic ATF or the wrong viscosity grade causes premature clutch pack wear.
Safety checks before you start
Park the vehicle on a level, solid surface. The Haldex coupling sits at the rear of the vehicle on most platforms, so the car must be level for an accurate oil fill later. Raise the vehicle on axle stands if needed. Never work under a car supported only by a trolley jack.
Pro Tip: Always loosen the fill plug before you touch the drain plug. If the fill plug is seized and you have already drained the oil, you cannot refill the system. A seized fill plug on an empty coupling is a far worse problem than a slow drain.
This single preparation step is the most overlooked safety check in DIY Haldex servicing. Check it first, every time.
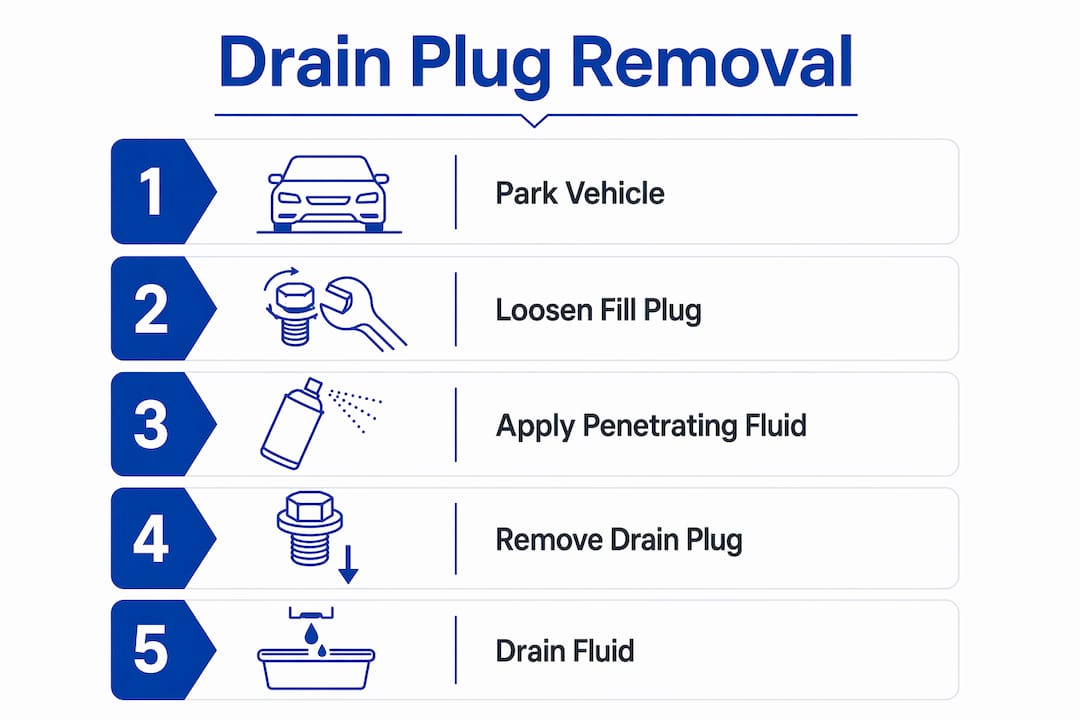
Step-by-step: how to remove the Haldex drain plug and drain the fluid
This procedure applies to 4th and 5th generation Haldex units, which are the most common on Audi, VW, Skoda, SEAT, Ford, and Land Rover platforms. Earlier generations follow a similar sequence but may differ in plug location.
-
Raise and support the vehicle. Position axle stands under the rear subframe or designated jacking points. Remove the undertray if fitted.
-
Locate the fill plug first. The fill plug sits on the side of the Haldex coupling housing. Use your 5mm Allen key to break it loose by half a turn. Do not remove it yet. You are simply confirming it is free. This is the critical first step that prevents a refill disaster.
-
Position your catch pan. Place it directly beneath the drain plug, which sits at the lowest point of the coupling housing.
-
Remove the drain plug. Insert your 8mm Allen key and turn anti-clockwise. The plug will be firm initially. Apply steady pressure rather than a sharp jerk. Once loose, unscrew it by hand for the final few turns and be ready for the oil to flow immediately.
-
Allow full drainage. Let the old fluid drain completely. This typically takes 3–5 minutes. Do not rush this step. Tilting the vehicle slightly nose-up can help the last few millilitres drain out.
-
Inspect the drain plug and threads. Check the plug threads for damage. Check the housing threads with a clean finger. Any roughness or metal particles in the drained oil warrants closer inspection before refilling.
-
Clean the drain port. Wipe the area around the drain hole with a lint-free cloth. Remove any debris or old sealant residue from the thread.
Pro Tip: If the drain plug feels seized, apply a small amount of penetrating fluid to the thread and wait 10 minutes before attempting removal again. Never use an impact driver on an Allen plug in an aluminium housing. The risk of rounding the socket or cracking the housing is high.
Understanding the Haldex AWD system helps you appreciate why clean, uncontaminated fluid matters so much. The coupling relies on precise hydraulic pressure to engage the rear axle. Degraded oil reduces that pressure and delays engagement.
What are the most common mistakes during Haldex drain plug removal?
Most DIY errors on this job are avoidable. They fall into a small number of recurring patterns.
-
Draining before loosening the fill plug. This is the most common DIY mistake and the most damaging. If the fill plug is corroded or seized, you are left with an empty coupling and no way to refill it without specialist tools or a workshop visit.
-
Over-tightening the drain plug. The correct torque is 30 Nm. Exceeding this strips the aluminium threads in the housing. Under-tightening causes leaks. Neither outcome is acceptable. Use a calibrated torque wrench, not a guess.
-
Reusing the old washer. A used copper or aluminium washer does not seal reliably. The cost of a new washer is negligible. The cost of a Haldex oil leak is not.
-
Skipping pump and filter cleaning on later generations. Simply replacing the fluid is not enough for 4th and 5th generation units.
Pump removal and cleaning of the filter strainer is required on later Haldex generations to prevent oil flow restriction even after the fluid has been replaced. The strainer accumulates metallic debris over time. A clean sump with a blocked strainer still starves the pump.
-
Ignoring oil condition. Dark, metallic, or milky fluid signals more than routine wear. Milky oil indicates water ingress, usually from a failed seal. Metallic particles suggest clutch pack or pump wear. Both conditions require investigation beyond a simple oil change. Read more about why Haldex oil degrades to understand what the drained fluid is telling you.
-
Using the wrong fluid. Different Haldex generations use different oil specifications. Using the wrong grade causes clutch slip, overheating, and premature failure. Always confirm the correct specification for your specific platform and generation before ordering.
How do you refit the Haldex drain plug and complete the oil change?
Refitting is straightforward if you have prepared correctly. Follow this sequence without shortcuts.
-
Fit the new drain plug and washer. Thread the plug in by hand first to avoid cross-threading. Once hand-tight, use your torque wrench and tighten to exactly 30 Nm. Do not exceed this figure.
-
Reinstall the pump if removed. Fit new O-rings and seals before reinstallation. Never reuse old seals on a pump that has been removed. Haldexparts stocks seal repair kits for 5th generation units specifically.
-
Refill the system. Use a syringe or hand pump to introduce fresh oil through the fill port. Fill slowly until oil just begins to overflow from the fill port. This overflow method is the only reliable way to confirm correct fill level on a level vehicle.
-
Refit the fill plug. Tighten to the manufacturer’s specified torque for your generation. Wipe away any spilled oil from the housing.
-
Lower the vehicle and run a leak check. Start the engine, allow the AWD system to cycle, then inspect the drain plug and fill plug for seepage. A dry housing after 10 minutes confirms a successful service.
Fluid volumes and specifications
| Parameter | Specification |
|---|---|
| Recommended refill volume | 0.7–0.75 litres |
| Maximum system capacity | Up to 0.85 litres |
| Drain plug torque | 30 Nm |
| Drain plug tool | 8mm Allen/HEX key |
| Fill plug tool | 5mm Allen key |
The recommended refill volume of 0.7–0.75 litres applies to most 5th generation units. Always verify the figure for your specific vehicle. Overfilling causes seal pressure and potential leaks. Underfilling starves the pump and accelerates wear.
Key takeaways
Correct Haldex drain plug removal requires the right tools, the right sequence, and a new washer every time, with 30 Nm torque on reinstallation and a fresh fluid fill to the overflow point.
| Point | Details |
|---|---|
| Loosen fill plug first | Always break the fill plug free before draining to avoid being unable to refill. |
| Use correct tools | An 8mm Allen key removes the drain plug; a torque wrench set to 30 Nm refits it. |
| Replace washer every time | A new copper or aluminium washer is required on every reassembly to prevent leaks. |
| Clean pump and strainer | On 4th and 5th generation units, clean the filter strainer and replace O-rings during service. |
| Refill to overflow on level ground | Fill until oil just overflows from the fill port to confirm correct fluid level. |
What I have learned from years of Haldex servicing
The instruction to loosen the fill plug first sounds obvious. In practice, a surprising number of experienced DIY mechanics skip it because they are focused on the drain. I have seen this mistake result in a car on stands with an empty coupling and a fill plug that would not budge without heat and specialist tools. That is an expensive lesson for the sake of one extra minute of preparation.
The other thing I would stress is generation awareness. Platform-specific knowledge is not optional with Haldex. A 3rd generation unit on a Ford Galaxy and a 5th generation unit on an Audi Q3 share a name and a basic concept. The service procedures are meaningfully different. The pump location differs. The filter type differs. The seal kit differs. Generic instructions get people into trouble here.
Patience with the torque wrench also matters more than most guides acknowledge. Aluminium housings are unforgiving. Thirty newton metres feels underwhelming if you are used to working on steel fasteners. Trust the specification.
Finally, if you complete a correct oil change and AWD fault codes persist, do not assume the service has failed. Persistent faults after a clean service often point to a worn pump, a failing pressure sensor, or a damaged clutch pack. Those are separate diagnoses. A correct oil change is the starting point, not the guaranteed fix.
— Mindaugas
Haldexparts has the parts to do this job properly
Completing a Haldex oil change to the correct standard means using OEM-grade components, not generic substitutes. Haldexparts supplies drain plugs, washers, correct-specification Haldex oils, and filters for Audi, VW, Ford, Land Rover, and other platforms from one place.
The Haldexparts service kits bundle the drain plug, washer, oil, and filter into a single order, removing the guesswork from parts selection. Kits are available for 4th and 5th generation units and are matched to your specific vehicle. Orders over £150 include free UK shipping. If you need a pump, seal kit, or filter alongside your oil change parts, the full range is available at haldexparts.co.uk.
FAQ
What size Allen key removes the Haldex drain plug?
The Haldex drain plug requires an 8mm Allen/HEX key on 4th and 5th generation units. The fill plug uses a 5mm Allen key.
What torque should the Haldex drain plug be tightened to?
The drain plug torque specification is 30 Nm. Always use a calibrated torque wrench and a new washer on reinstallation.
How much oil does a Haldex system take?
Most 5th generation Haldex units require 0.7–0.75 litres of fluid for a refill, with a maximum system capacity of up to 0.85 litres. Fill until oil just overflows from the fill port on a level vehicle.
How often should the Haldex oil be changed?
Haldex oil servicing is recommended every 30,000 km under normal driving conditions. Towing, track use, or frequent off-road driving shortens this interval.
Do I need to remove the pump during a Haldex oil change?
On 4th and 5th generation units, pump removal and filter strainer cleaning is required for a complete service. Simply draining and refilling the fluid leaves debris in the strainer that restricts oil flow and accelerates pump wear.