

Cleaning the Haldex solenoid restores AWD operation when the fault comes from sludge or gel deposits on the valve and coil resistance still reads within a plausible range. It rarely helps when the coil reads open, the PCB shows heavy corrosion, or you can see burnt components. Before you touch a spanner, measure coil resistance, check the connector for corrosion, inspect the pump filter for sludge, and disconnect the battery safely.
TL;DR:
- Cleaning the solenoid is most effective when deposits are gel-like or sludge on the valve, but it rarely helps if the coil reads open or the PCB is heavily corroded.
- Intermittent AWD faults often show symptoms like fluctuating warning lights, judder on full lock, or a pump that runs constantly or not at all, which should be checked before disassembly.
- Proper cleaning involves using non-acetone gearbox cleaner for the internal galleries and dedicated contact cleaner for electrical contacts, with careful drying to prevent rapid corrosion.
- Replacing O-rings and seals with fresh parts, torquing fasteners correctly, and refilling with Haldex-specific oil are critical steps to ensure reliable reassembly and operation.
- If electrical tests reveal an open circuit or cracked housing, cleaning alone will not fix the fault, and replacing the unit or pump is recommended.
Table of Contents
- Symptoms and quick checks before you strip anything down
- Tools, cleaners and spares you’ll need for Haldex solenoid maintenance
- How do you remove the Haldex pump for solenoid access?
- Bench procedure for cleaning the N373 solenoid and pump screen
- Drying, resealing and reassembly done properly
- How do you test the Haldex system after reassembly?
- Service intervals that actually prevent sludge coming back
- Why trust this Haldex solenoid cleaning procedure
- When cleaning makes sense versus when to replace the unit
- Where to buy the right Haldex parts for this job
- Primary sources and further reading
- Sources
- FAQ
Symptoms and quick checks before you strip anything down
Most drivers notice a Haldex fault long before they know what “N373” means. The warning signs are consistent enough that you can usually narrow the cause before opening anything up.
Watch for these patterns:
- An ESP or 4WD warning light appearing intermittently, often worse when cold
- Judder or jerking felt on full lock, typically in car parks or tight manoeuvres
- AWD engagement that comes and goes rather than failing completely
- A pump that runs constantly or not at all when you’d expect a brief precharge cycle
Coil resistance testing is the first real diagnostic step. Exact figures vary by generation and model, so check your specific workshop manual rather than relying on a generic number. What matters more is consistency: a reading that drifts, jumps to infinity, or shows a dead short tells you more than the raw figure ever will.
Pull the connector and look closely. The N373 valve typically uses sprung push-fit contacts rather than soldered joints, and corrosion on those pins is a genuinely common cause of intermittent faults. Community diagnostic threads on Audi-sport describe cases where cleaning corroded push-fit contacts restored the valve to normal service without replacing the controller at all. Look for green or white deposits, and test continuity across the pins while gently flexing the connector.
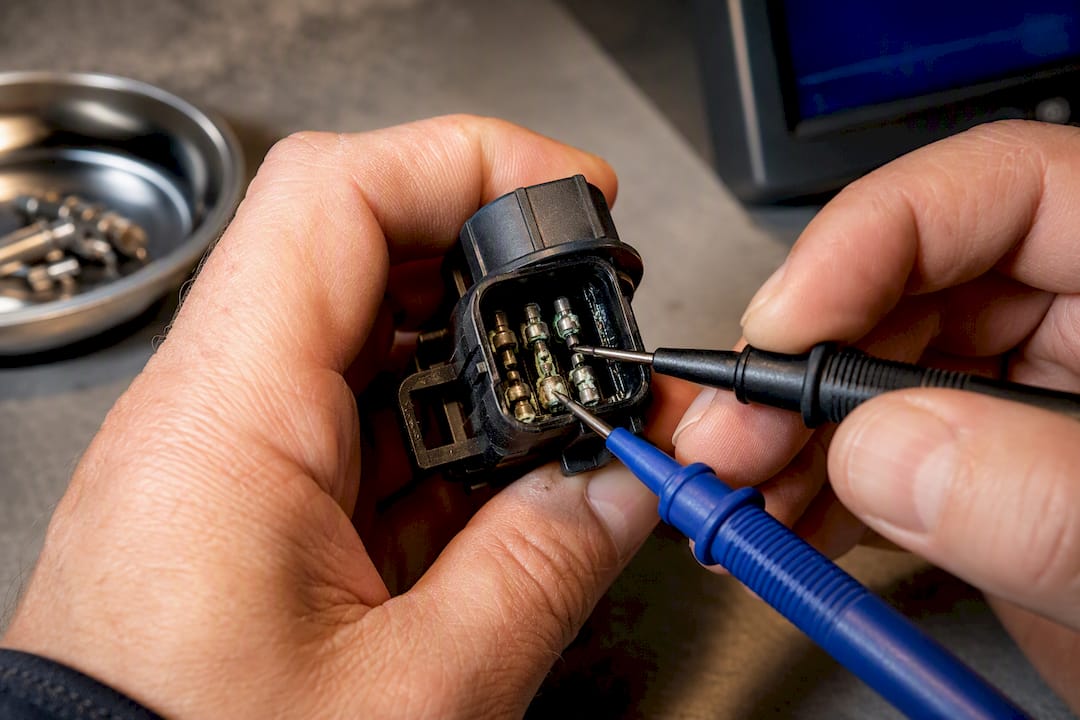
Finally, check the fluid. Dark, gritty oil or a waxy film on the pump screen points to contamination. Emulsified, gel-like residue on the solenoid itself is the strongest sign that cleaning is worth attempting.
Tools, cleaners and spares you’ll need for Haldex solenoid maintenance
Gather everything before you start. Running out of contact cleaner halfway through a bench strip is a bad way to spend a Saturday.
Mechanical tools:
- Axle stands rated for the vehicle weight, plus a trolley jack
- Torque wrench and a socket set covering the pump housing bolts
- Allen keys for the solenoid retaining screws
- A basic understanding of your prop-shaft removal points, since some vehicles need the shaft dropped for clearance
Cleaning products:
- A non-acetone gearbox interior cleaner, specifically formulated to lift waxy clutch debris without attacking seals or wiring
- Dedicated electrical contact cleaner for the connector pins
- Never use acetone or strong solvents anywhere near the solenoid body or rubber seals
Consumables and drying kit:
- New O-rings and seals sized to your Haldex generation
- A replacement filter element if your unit uses one (Gen3/4 typically does)
- Fresh Haldex-specified oil for the refill
- Low-pressure compressed air, a heat gun set to low, nitrile gloves, and eye protection
Pro Tip: Buy the O-ring kit before you start, not after you’ve split the housing. A dry-fitted old O-ring that looks “fine” almost always leaks slightly once refilled, and you don’t want to be waiting on post for a £2 part with the car up on stands.
How do you remove the Haldex pump for solenoid access?
Getting the unit off the car safely matters as much as the cleaning itself. Rushing the removal is where connectors get snapped and fasteners get lost.
- Chock the wheels, raise the vehicle on axle stands rated for the job, and disconnect the battery. Note that some ECUs lose adaptation values on disconnect, so check whether your model needs a relearn procedure afterwards.
- Lower or remove the exhaust and prop-shaft sections that obstruct access, following your vehicle’s specific clearance points.
- Undo the mounting fasteners holding the Haldex pump and coupling assembly, working methodically so you know which bolt came from where.
- Unplug the ECU connector before you unplug the solenoid connector. Liqui Moly’s technical guidance specifically recommends disconnecting the precharge pump connector first for better access to the filter screen and housing.
- Extract the solenoid assembly carefully. It’s typically a push-fit component, not threaded, so wiggle rather than force it.
- On the bench, photograph the wiring layout before you disturb anything further, label every connector with tape, and clamp the housing in a vice fitted with soft jaws to avoid crushing the casing.
- Sort fasteners into a tray by location. Nothing wastes more time than guessing which bolt goes where during reassembly.
Bench procedure for cleaning the N373 solenoid and pump screen
This is the core of the job, and it rewards patience over speed.
- Ease the solenoid free from its housing, taking care not to nick the O-ring seated around its body. Set the O-ring aside for inspection or replacement.
- Clean the electrical contacts first, using dedicated contact cleaner and a soft brush rather than anything abrasive. This addresses the corrosion issue directly, since sprung push-fit pins are the most common intermittent-fault culprit.
- Flush the solenoid body and internal galleries with a non-acetone gearbox interior cleaner. Liqui Moly’s own guidance describes a flush-until-clear method: keep spraying and draining until the fluid runs clean rather than cloudy or dark, using Pro-Line Gearbox Interior Cleaner or an equivalent product designed for this job.
- Clean the pump mesh screen and filter housing separately. Remove any waxy clumps by hand first, then flush. If you find larger particulate rather than fine sludge, that’s often a sign of clutch pack wear rather than simple contamination, and cleaning alone won’t fix it.
- Inspect the residue as you go. Thick waxy particles appearing late in the flush, after the fluid has mostly cleared, point to more advanced internal wear than a quick clean will resolve.
- Check the solenoid housing for cracks and the coil for continuity one more time before deciding to refit rather than replace.
Community bench-service write-ups, including a detailed thread on the Evoque Owners Club, show this exact sequence restoring operation on plenty of Gen3 and Gen4 units.
Pro Tip: If the coil reads open circuit, or you can see a cracked housing or heavily corroded PCB, stop. Cleaning won’t fix a broken electrical path, and reassembling a damaged unit just means doing this whole job twice.
Drying, resealing and reassembly done properly
Rushing the drying stage is the single most common reason a cleaned solenoid fails again within weeks.
Start with low-pressure compressed air to blow out as much residual fluid as possible from the galleries and connector recess. Follow with a heat gun on its lowest setting, kept moving rather than held on one spot, and never let surface temperature exceed 60°C near the seals. Give it more time than feels necessary; trapped moisture is a well-documented cause of rapid re-corrosion on the internal contacts, according to hands-on reports on the Freel2 forum.
Reassembly order matters more than most DIYers expect:
- Plug the solenoid into the ECU connector before you seat the assembly back into the housing. Skipping this step is a known way to bend or damage the connector pins, a tip repeated across multiple bench-service threads.
- Fit new O-rings rather than reusing old ones, and apply a light smear of compatible lubricant where the manufacturer allows it.
- Torque all fasteners to the vehicle’s specification where you have access to the figures.
- Refill with the correct Haldex-specified oil, never generic ATF, and cycle the ignition a few times to let the pump prime before checking for leaks. If you’re unsure about fluid compatibility, this comparison of Haldex oil versus ATF is worth reading before you buy anything.
How do you test the Haldex system after reassembly?
Don’t call the job done until you’ve actually confirmed it.
- Measure coil resistance again and check continuity across the connector pins, flexing the loom gently to rule out an intermittent break you missed first time round.
- With the ignition on, trigger a precharge pump event and check connector voltages match what you’d expect at that point in the cycle. A healthy pump gives a short, distinct whirr rather than a continuous drone or total silence.
- Plug in a diagnostic scanner, read and clear any stored Haldex fault codes, then take the car for a road test that specifically includes tight, full-lock manoeuvres to try to reproduce the original judder.
- If the fault returns immediately, or the ECU logs a fresh code within a few miles, the problem likely sits deeper than the solenoid. At that point, remanufactured pump assemblies or ECU-level repair become the more realistic route.
Service intervals that actually prevent sludge coming back
A clean solenoid stays clean longer if the maintenance rhythm around it is right, and that rhythm differs by generation.
- Gen3 and Gen4 units use a replaceable filter element, so routine servicing at the manufacturer’s interval catches most contamination before it reaches the solenoid.
- Gen5 units commonly lack a replaceable filter, which means more frequent visual inspection of the screen becomes the substitute, something covered in more depth in this Gen5 filter service guide.
- Check oil colour and clarity at every service. Dark, gritty fluid or waxy particles in the drain are your earliest warning, well before the ESP light comes on.
- Using correct filling tools reduces the air pockets and trapped contaminants that accelerate sludge formation in the first place, and understanding what actually causes Haldex failure helps you spot the pattern early.
Why trust this Haldex solenoid cleaning procedure
This procedure draws on manufacturer technical guidance and years of documented DIY bench work, not guesswork.
- Model-specific how-to guides covering solenoid access, replacement, and parts selection across multiple Haldex generations have been compiled.
- The core cleaning method, including the non-acetone cleaner recommendation and the flush-until-clear technique, comes directly from Liqui Moly’s own Haldex clutch technical bulletin.
- Real-world corroboration comes from forum communities where owners have photographed and documented their own bench strips, including the Evoque Owners Club threads referenced throughout this guide.
When cleaning makes sense versus when to replace the unit
The honest answer is that cleaning is a genuinely good option for a specific, narrower set of faults than most forum threads admit. If the coil tests within a sensible range, the connector isn’t badly corroded, and you can see sludge or gel on the valve itself, cleaning it yourself with proper drying equipment is a reasonable weekend job. Where I’d stop you is anyone tempted to clean a unit showing PCB corrosion or a cracked sealed housing. That’s not a cleaning job, it’s a false economy, because you’ll be back under the car within a month.
Weigh the trade-off honestly too. A bench clean costs you cleaner, seals, and an afternoon. A remanufactured pump costs more upfront but removes the guesswork entirely. If you’re not certain which category your fault falls into, browsing replacement solenoid options before you commit to a full strip-down is time well spent.
— Mindaugas
Where to buy the right Haldex parts for this job
Once you’ve cleaned the solenoid and it’s still misbehaving, or the coil test failed the first time, sourcing the correct replacement matters more than sourcing the cheapest one. OEM-grade pumps, oils, filters and complete service kits selected by brand and Haldex generation are available from specialized suppliers, so you’re not left matching part numbers by guesswork.
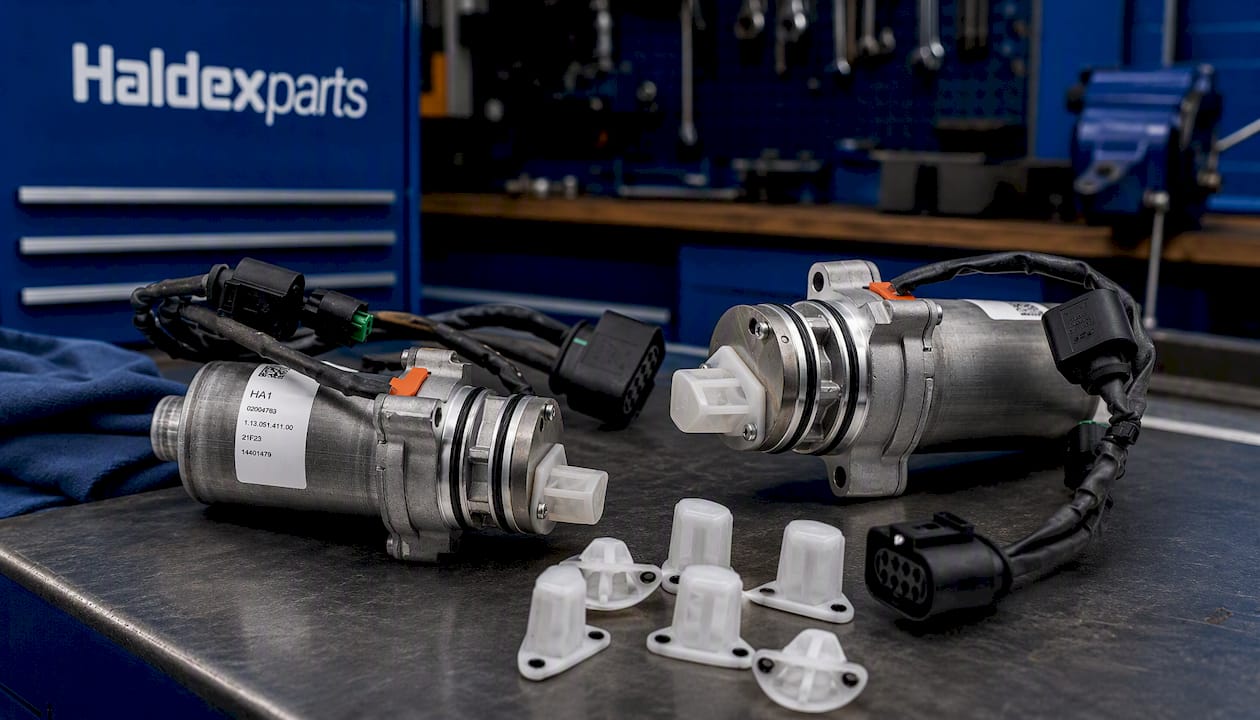
If your pump nose has worn threads or damaged fittings rather than a simple sludge problem, these AWD pump nose replacement tips for 1st and 2nd generation Haldex pumps walk you through the fix without a full pump swap. Gen5 owners running a Porsche will find the correct unit listed as the Gen5 oil pump 9P1906271, while Audi R8 owners need the Gen5 oil pump 0D4906271A specifically, since Gen5 pumps aren’t interchangeable across brands despite looking similar. For fresh oil, filters or a complete kit to finish the job properly, the full Haldex parts catalogue lets you filter by generation and vehicle so you order the right item the first time, with free shipping on orders over £150.
Primary sources and further reading
The procedure above draws directly on manufacturer guidance and documented community bench work, not assumptions.
- Liqui Moly’s technical bulletin on Haldex clutch cleaning sets out the non-acetone cleaner and flush-until-clear method referenced throughout.
- The Evoque Owners Club Haldex service thread documents a real bench strip with photographs of the screen and solenoid.
- For fluid change fundamentals beyond Haldex specifically, this guide to transmission fluid changes covers the general principles worth knowing.
Sources
- LIQUI MOLY technical information — Haldex clutch
- Haldex service with pictures — Evoque Owners Club
- Audi-sport
- Haldex maintenance — Freel2 forum
FAQ
What can you use to clean a Haldex solenoid?
Use a non-acetone gearbox interior cleaner for the solenoid body and internal galleries, and a dedicated electrical contact cleaner for the connector pins. Liqui Moly’s technical guidance specifically warns against acetone and strong solvents, since they can damage seals and wiring insulation.
What are the symptoms of a failing Haldex pump?
The most common signs are an intermittent ESP or 4WD warning light, judder or jerking on full lock, and a precharge pump that runs continuously or not at all. Dark, gritty oil or waxy debris on the pump screen usually confirms contamination is the underlying cause.
How often should Haldex fluid be changed?
Service intervals vary by generation, with Gen3 and Gen4 units using a replaceable filter that supports a standard interval, while Gen5 units often lack that filter and need more frequent visual checks instead. Checking oil colour and clarity at every service catches contamination long before warning lights appear.
How do I check if my Haldex system is working properly?
Measure coil resistance and connector continuity, then trigger a precharge pump event and confirm you hear a short, distinct whirr rather than silence or continuous running. Scanning for stored fault codes and road-testing on full lock afterwards confirms whether the judder has actually resolved.