
Bleeding a Haldex coupling comes down to four moves: prime the pump, clean or replace the filter or pump screen, refill with the correct Haldex-specified oil, and run a pump relearn to force any trapped air out. Get the sequence wrong, or skip the screen inspection, and you’ll leave the coupling running low on pressure even with fresh oil in the housing.
What you need before you start:
- Hand pump or large syringe for filling
- Generation-correct Haldex oil
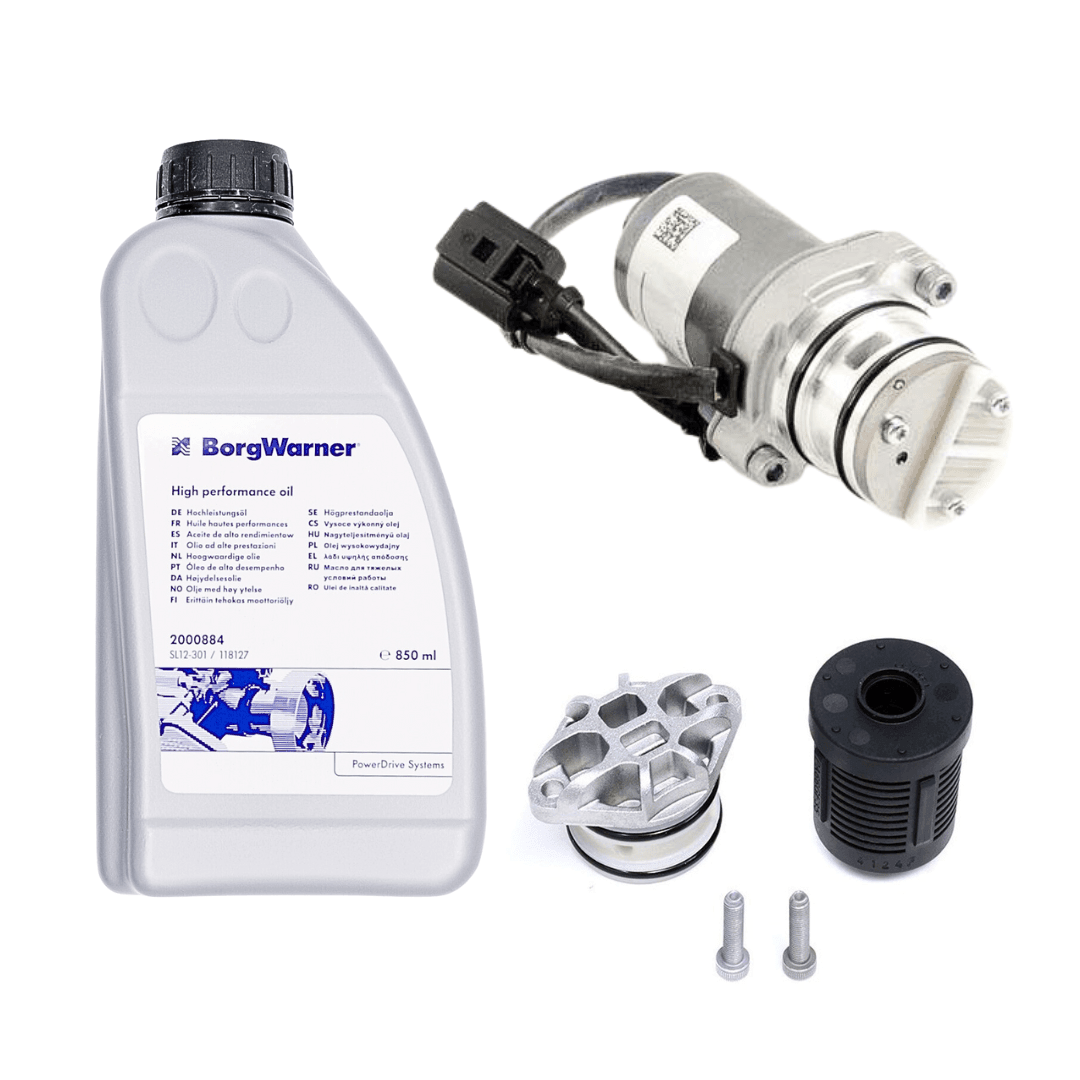
- Filter kit (Gen 1–4) or pump screen access (Gen 5+)
- A diagnostic tool capable of pump activation, such as VCDS or ODIS, or a documented manual drive-cycle as a fallback
Most VAG-platform vehicles need this service roughly every three years or between 20,000 and 40,000 miles, and the most common failure isn’t the oil at all. It’s a blocked pump screen starving the system of pressure long after the fluid looks clean.
Key Takeaways
A correct Haldex bleed requires priming the pump, servicing the filter or screen, refilling with generation-specific oil, and completing a diagnostic or drive-cycle relearn.
| Point | Details |
|---|---|
| Screen inspection is mandatory | Check the filter or pump screen every service, regardless of how clean the oil looks. |
| Match oil to generation | Use the Haldex-specified oil for that exact generation, never a generic substitute. |
| Relearn confirms success | Run pump activation cycles via diagnostic tool or manual drive-cycle until air stops appearing. |
| Service every 3 years or 20,000 to 40,000 miles | Bring the interval forward for towing, short trips, or hard driving. |
| Source matched kits from Haldexparts | Haldexparts supplies generation-specific oil, filter, and pump seal kits with correct fitment. |
Table of Contents
- When does a Haldex system need bleeding?
- Tools and parts you need for a Haldex bleed
- How do you prepare the vehicle safely?
- Step-by-step Haldex bleed procedure
- Which Haldex generation are you working on?
- How do you verify the bleed actually worked?
- Common Haldex bleed mistakes and how to fix them
- Which oil, filter and service kit should you use?
- How often should you bleed and service a Haldex coupling?
- A shop-floor view on where DIY jobs go wrong
- Get the right Haldex kit before you start the job
- Frequently asked questions
- Sources
When does a Haldex system need bleeding?
Air contamination or a tired coupling rarely announces itself with one obvious fault. It shows up as a pattern.
Watch for these signals:
- Delayed rear axle engagement under acceleration, especially pulling away on wet or loose surfaces
- Stored fault codes in the ABS or AWD control module, even if no warning light is currently lit
- A dashboard AWD or traction warning that clears itself after a restart
- Uneven torque delivery that feels like the rear axle is “catching up” late
- Dark, gritty, or metallic-smelling oil visible at the drain plug
Diagnostically, look for oil temperature or pressure readings that sit outside the expected band during a live data scan, or contamination you can see the moment the drain plug comes out. On timing, the safe default is that three-year or 20,000 to 40,000 mile window, but pull that forward if the vehicle tows regularly, sees hard launches, or does mostly short urban trips where the coupling never reaches a proper working temperature.
Tools and parts you need for a Haldex bleed
Get everything on the bench before you jack the car up. Running back for a missing hex key with the drain plug already out is how underfills happen.
Parts:
- Haldex oil in the correct generation-specific specification
- OEM filter kit or pump screen components, depending on generation
- New crush washers and any sealing o-rings the kit specifies
Tools:
- Syringe or hand-operated fluid pump for refilling
- Hex/Allen keys sized to your generation’s fill and drain plugs
- Torque wrench
- Ramps or a lift, plus axle stands if working from ground level
- Clean rags, a drain pan, and a diagnostic tool for pump activation
A proper tool list matters more here than on a routine oil service, because the pump relearn step genuinely needs live data. VCDS and ODIS handle pump activation and oil-temperature readouts reliably, though some budget OBD tools lack the pump calibration channels needed for a proper relearn on certain models. If you don’t have access to one, a manual drive-cycle (several minutes of varied-speed driving with deliberate wheel-slip scenarios) can substitute, though it’s less precise and worth confirming afterwards with a live-data check where possible.
Pro Tip: Buy your oil and filter kit as a matched set rather than sourcing components separately. Mismatched crush washers are a common cause of weeping drain plugs that get blamed on bad workmanship six months later.
How do you prepare the vehicle safely?
Get the car properly supported before anything else. A Haldex coupling sits low and central, and working under an unstable vehicle to reach it is the fastest way to turn a routine service into an insurance claim.
- Use a lift, or a level set of axle stands rated for the vehicle’s weight
- Immobilise the vehicle and disconnect or isolate the battery where the procedure calls for it, but reconnect before diagnostic work
- Wear gloves and eye protection when draining, since used Haldex oil carries metal particulate
- Warm the vehicle first so oil sits in the recommended 20 to 40°C range, and keep the car level or slightly nose-up to help full drainage
Pro Tip: Double-check which drain plug you’re looking at before you start turning anything. The Haldex fill and drain points sit close to the final drive housing on several platforms, and rounding off the wrong plug on a rushed job is an expensive mistake. A drain plug removal guide is worth keeping open on a second screen if it’s your first time on a given platform.
Step-by-step Haldex bleed procedure
The short version: warm the oil, drain it, service the filter or screen, refill to overflow, then run a pump relearn until the air is gone. Here’s the detail.
- Warm the vehicle enough to bring Haldex oil into the 20 to 40°C range, checked via diagnostic tool where available.
- Remove the fill plug first. If you can’t get it out, don’t drain the system, since you’ll be stuck with an empty housing.
- Remove the drain plug and let the oil fully empty into a catch pan.
- Remove the filter (Gen 1–4) or access the pump screen (Gen 5+) and inspect it for debris or a partial blockage.
- Clean or replace the filter/screen. Lubricate new o-rings lightly before fitting to avoid tearing them on installation.
- Refit the drain plug with a new crush washer, torqued to the manufacturer’s specification for that generation.
- Refill via the fill hole using a syringe or hand pump, adding oil slowly until it overflows at the fill port. Typical fill volumes sit around 650 to 700ml on many Gen 4 applications, though always confirm against your specific model.
- Refit the fill plug to torque spec.
- Connect your diagnostic tool and run the pump activation sequence, cycling it until fluid circulation is smooth and no air is being expelled. Top up small measured amounts as the pump primes and draws fluid through the circuit.
- If no scan tool is available, complete a manual drive-cycle with varied speeds and light wheel-slip provocation, then recheck fluid level afterwards.
Pro Tip: Air locks usually hide in the pump housing itself, not the main coupling body. If the pump won’t build pressure on the first activation cycle, don’t assume it’s faulty. Run the cycle two or three more times before you start suspecting the pump motor.
| Point | Details |
|---|---|
| Warm oil first | Bring oil to 20 to 40°C before draining for an accurate reading and cleaner drain. |
| Screen check is not optional | Inspect the filter or pump screen every service, even if oil looks clean. |
| Fill to overflow | Refill via syringe until oil overflows the fill port, not to an arbitrary level. |
| Pump relearn confirms the bleed | Cycle the pump via diagnostic tool or drive-cycle until air stops appearing. |
Which Haldex generation are you working on?
Servicing the wrong way for the generation in front of you is the single biggest cause of repeat visits. Early and mid-generation Haldex couplings (Gen 1 through Gen 4) use a serviceable paper or mesh filter that sits in its own housing and needs replacing at every service. From Gen 5 onward, BorgWarner removed the replaceable filter entirely and moved to a pump-mounted screen instead, which is cleaned rather than swapped.
That’s a meaningful operational shift. Older systems were reactive, engaging the rear axle after slip was detected. Later generations run more proactively, pre-loading torque before slip even happens, which puts more continuous demand on the pump and makes screen cleanliness more critical, not less.
Gen 4 and later systems commonly need diagnostic pump activation as a mandatory step, not an optional extra, because the pump relearn resets the control module’s expectation of normal operating pressure. Skip it and the module may flag a fault even after a textbook-clean service.
| Generation | Filter type | Diagnostic activation needed? |
|---|---|---|
| Gen 1–3 | Replaceable filter | Rarely required |
| Gen 4 | Replaceable filter | Commonly required |
| Gen 5+ | Pump screen (clean, not replace) | Commonly required |
A screen that looks fine on quick inspection can still be partially restricted. If oil flow felt sluggish during drain, clean the screen even if it looks passable, since a pump repair reference is worth having on hand for the Gen 4/5 pump removal sequence specifically.
How do you verify the bleed actually worked?
Don’t call the job done until you’ve checked it three ways: static, diagnostic, and on the road.
On the workshop check, confirm there are no leaks at either plug, that both are torqued correctly, and that fluid sits at the overflow point rather than an estimated level.
Diagnostically, pull live data for oil temperature and pressure where the platform supports it, check the AWD module for stored faults, clear anything historic, and run a final pump activation test to confirm smooth response.
Then road-test it. A short drive with a staged load, gentle wheel-slip provocation, and a couple of hard-ish pulls away from standstill will reveal whether rear engagement is prompt. Recheck for leaks and fluid level once the car’s back on the lift, and note whether the AWD warning light stays off through a full ignition cycle.
Common Haldex bleed mistakes and how to fix them
Most comebacks on Haldex work trace back to one of a handful of repeat offenders.
- Stuck filter won’t budge: a screw driven into the filter’s centre gives pry bars something to grip, a trick reported reliably by DIY forum accounts for stubborn housings.
- Pump won’t prime: run several more diagnostic activation cycles before assuming pump failure, or complete a short drive with ignition cycling if no scan tool is available.
- Suspected blocked screen: sluggish drain flow or metallic debris at the drain plug both point to a screen needing a clean, regardless of how the oil looks.
Don’t do this: overfill past the overflow point, use a non-specified oil grade because it was “close enough”, or mistake the final drive drain plug for the Haldex drain plug on shared-housing layouts.
Pro Tip: If the AWD warning persists after a correct bleed and clean fault clear, stop chasing fluid and check the pump motor, solenoid valve, or control module instead. A solenoid valve replacement guide covers the next diagnostic branch if bleeding alone hasn’t resolved it.
Which oil, filter and service kit should you use?
Match the oil and kit to the exact generation fitted to the vehicle, not the closest one on the shelf. A generation-specific Haldex oil, paired with an OEM-grade filter or pump seal kit, gets you correctly sized o-rings and crush washers straight out of the box rather than trying to source them separately.
- Buy oil and filter or pump seal kit together as a matched set for the confirmed generation
- Check the product page for generation fitment before ordering, not just the vehicle make
- Budget for the full fill volume plus a small margin, since priming losses during pump activation can use slightly more than the quoted fill spec
Pro Tip: A mismatched crush washer or the wrong filter housing diameter is invisible until the car’s been running for a week and starts weeping oil. OEM-grade dimensions remove that guesswork entirely. Haldexparts’ service kits are built to generation-specific fitment for exactly this reason, and for workshops handling higher fluid throughput, a dedicated transmission fluid flush setup can speed up the draining stage on busier days.
How often should you bleed and service a Haldex coupling?
Stick to roughly three years or 20,000 to 40,000 miles as your baseline, pulled forward for towing, frequent short trips, or hard driving. Log the date, mileage, and parts used at every service. It’s the easiest way to stop a coupling falling through the gaps between owners or technicians.
A shop-floor view on where DIY jobs go wrong
The jobs that go smoothly are the ones where every part was on the bench before the car went on the lift, new crush washers included. Where people lose time is usually a blocked screen they didn’t check because the oil “looked fine”, or a diagnostic tool they didn’t have ready when the pump needed activating. Line it all up first.
Get the right Haldex kit before you start the job
Haldexparts exists so you’re not guessing at filter dimensions or hunting for the right oil spec halfway through a job with the car already on the lift. Every kit is matched to a specific Haldex generation, which means correct crush washers, correctly sized o-rings, and the exact oil grade the coupling was designed for, not a close approximation.
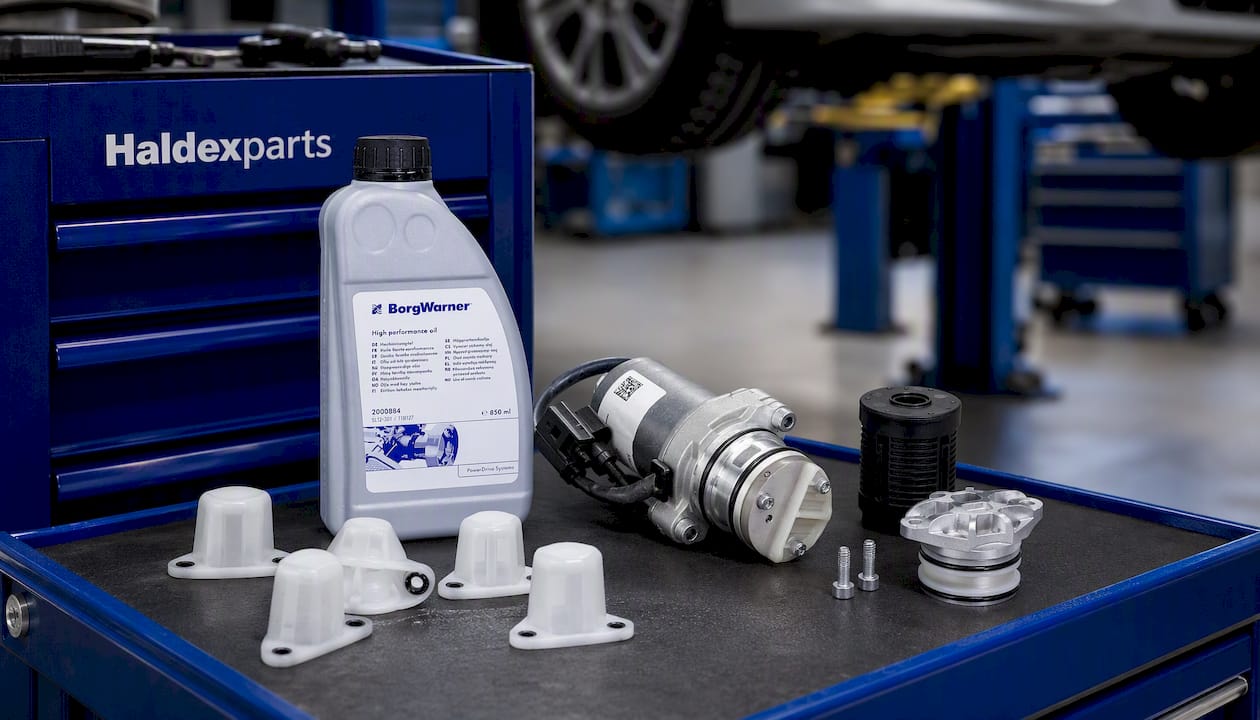
Kits combine pump seals, filters, and oil in a single order, so you’re not chasing three separate suppliers to complete one service. Orders over £150 ship free, and product pages list generation fitment clearly so you can confirm compatibility before you buy rather than after the box arrives. Whether you need a complete pump, oil, and filter kit or just a replacement oil matched to your generation, check the fitment details on the product page and order what the job actually needs, not what happens to be in stock at the local parts counter.
Frequently asked questions
Do I need a scan tool to bleed a Haldex system? A diagnostic tool capable of pump activation, such as VCDS or ODIS, gives the most reliable relearn on Gen 4 and later systems. Without one, a manual drive-cycle with varied speeds and light wheel-slip can work as a fallback, though it’s harder to confirm with certainty.
How much oil does a Haldex bleed use? Fill volumes vary by generation and model, but many Gen 4 applications sit around 650 to 700ml. Always fill via syringe or hand pump until oil overflows at the fill port rather than measuring to a fixed volume.
What happens if I skip the pump screen or filter during a bleed? The oil will look fresh, but a restricted screen or clogged filter continues to limit pressure, meaning symptoms like delayed engagement or warning lights can persist even after a fluid change.
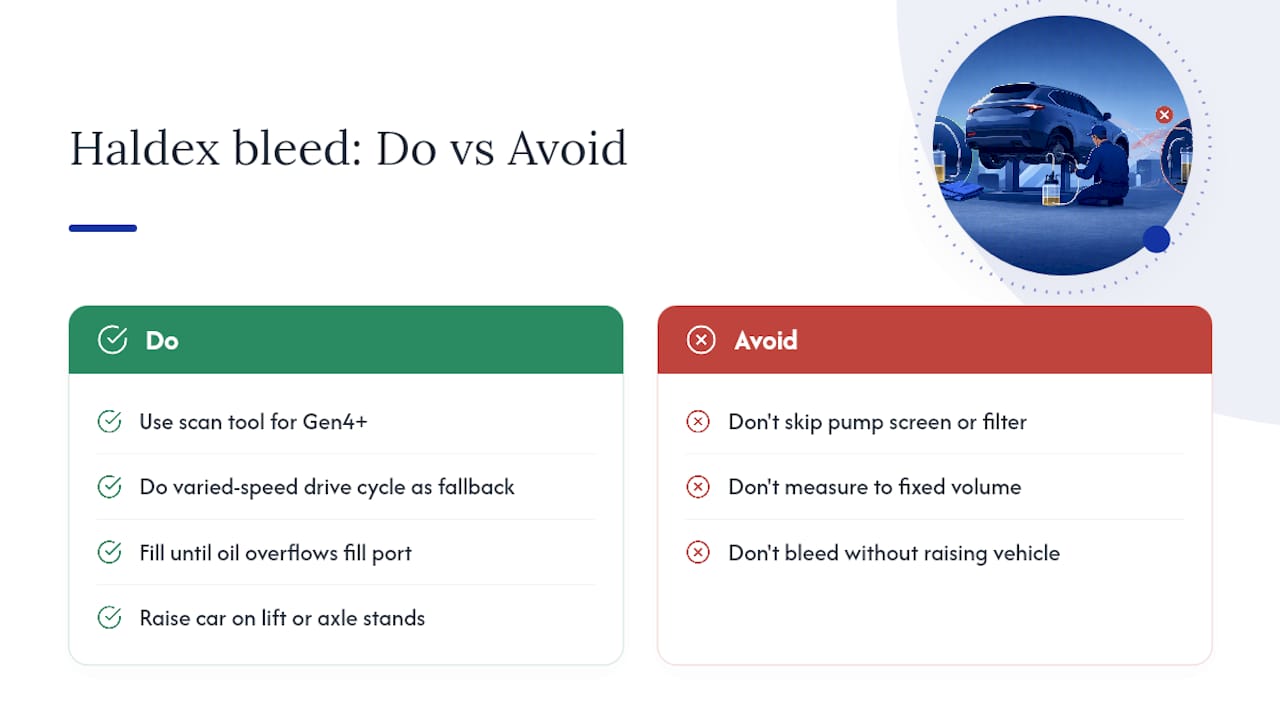
Can I bleed a Haldex system without lifting the car? It’s not advisable. Reaching the fill and drain plugs safely, and draining fully, generally needs the vehicle raised on a lift or supported securely on axle stands.
Sources
- Haldex oil change service guide - Mechalex
- How to service Haldex generation 4 full guide - JCR-Leeds
- How To Identify and Service Your VW or Audi Haldex AWD System – ECS Tuning